A/B Testing Strategy and Best Practices for Conversion Optimization
Overview
Welcome to Pack's journey toward enhancing your Hydrogen storefront experience! As part of our commitment to providing a comprehensive digital solution, we are excited to introduce Pack A/B testing. This feature gives you a straightforward method to manage and create content variants for testing purposes across your storefronts.
Got questions?
We would love to help you and hear your thoughts on A/B testing. Reach out through Pack Support.
Pack’s A/B testing brings the same ease of content management from our customizer into your testing workflow for your storefronts. Additionally, leverage our APIs to ensure flexibility in defining and executing your tests according to your specific needs.
Our team is continuously dedicated to improving our A/B testing product and your experience across all platforms. Keep an eye out for ongoing updates as we introduce new features and optimize your experience.
How to opt-in to Pack A/B Testing
Pack A/B testing is available to everyone as a public opt-in. To opt-in, follow these steps:
- Go to app.packdigital.com
- Navigate to your storefront
- Go to your Settings found in the left sidebar
- Under Experimental features, turn on A/B Testing (Beta)
- You should now see A/B tests in the sidebar. If not, refresh the admin panel.
The Experimental features section only appears for storefronts hosted on Oxygen.
Please follow the setup requirements below for some additional development steps needed to get A/B testing working in your storefront.
A/B Testing Storefront Setup Requirements
- A Hydrogen storefront on Pack
- Follow our A/B testing implementation guide to add Pack A/B testing to your existing Hydrogen storefront
- Ensure you have the required Pack package versions
@pack/hydrogen>=3.2.6@pack/react>=4.2.0- Running several tests at once, as described below, needs
@pack/hydrogen4.0. See Upgrading to @pack/hydrogen 4.0.
- Update your storefront's code to support Pack A/B testing. Follow our A/B testing implementation guide.
Managing A/B Tests
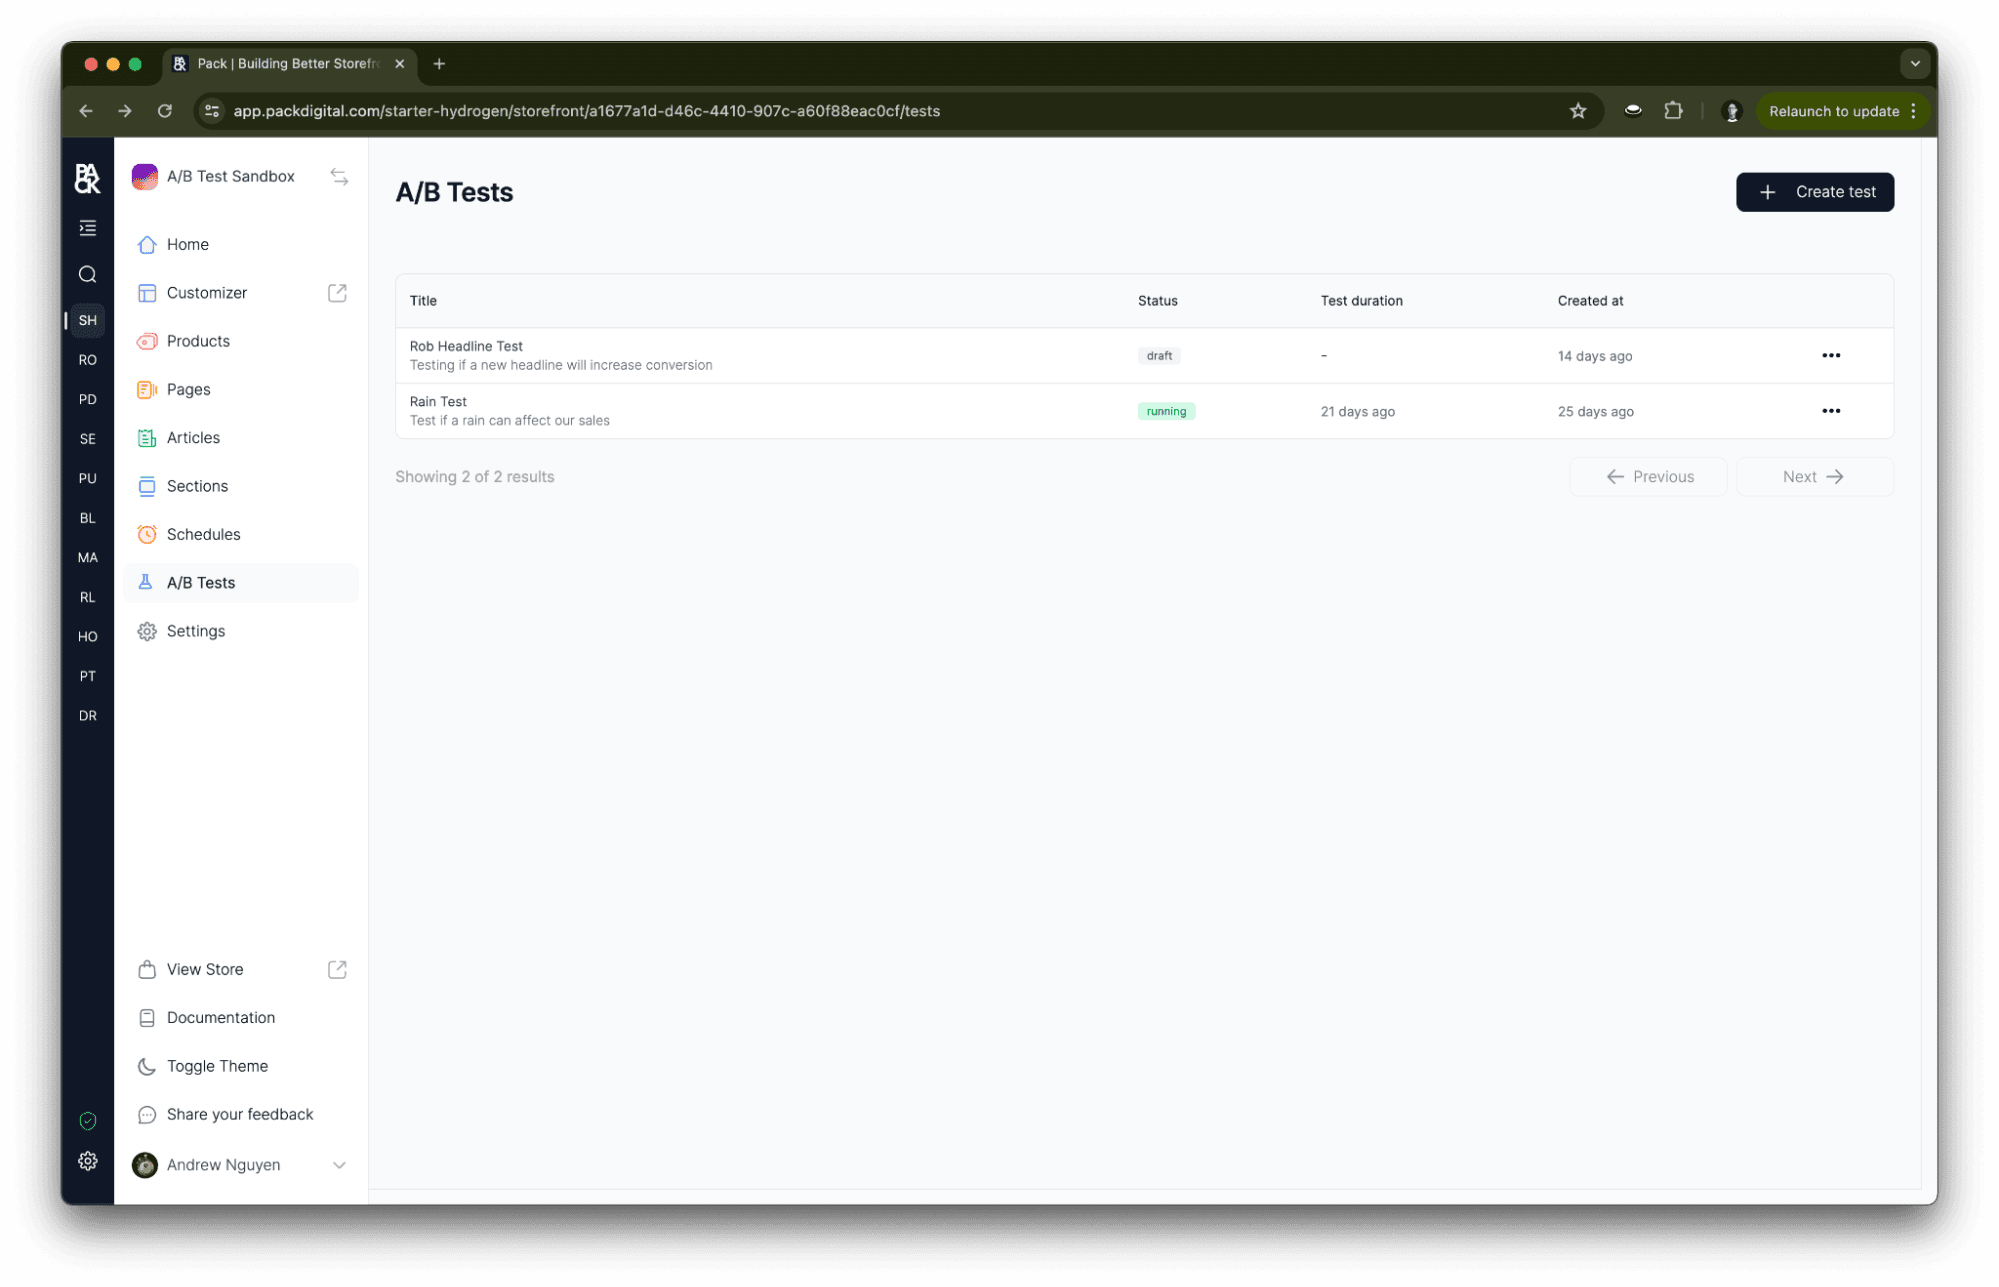
In the admin panel, you can view a list of all your A/B tests. These tests can be in a draft, running, paused, or ended state. To view and manage your tests:
- Navigate to your admin panel
- Click A/B tests in the sidebar
- Create, update, delete, and run tests
If Pack has enabled personalization for your storefront, A/B tests is called Experiments and lists your A/B tests alongside your personalizations. Filter it to A/B Tests, and create a test with New experiment → A/B Test. See Experiments.
You can also delete tests from this view. However, a running or paused test cannot be deleted. End it first.
Creating a test
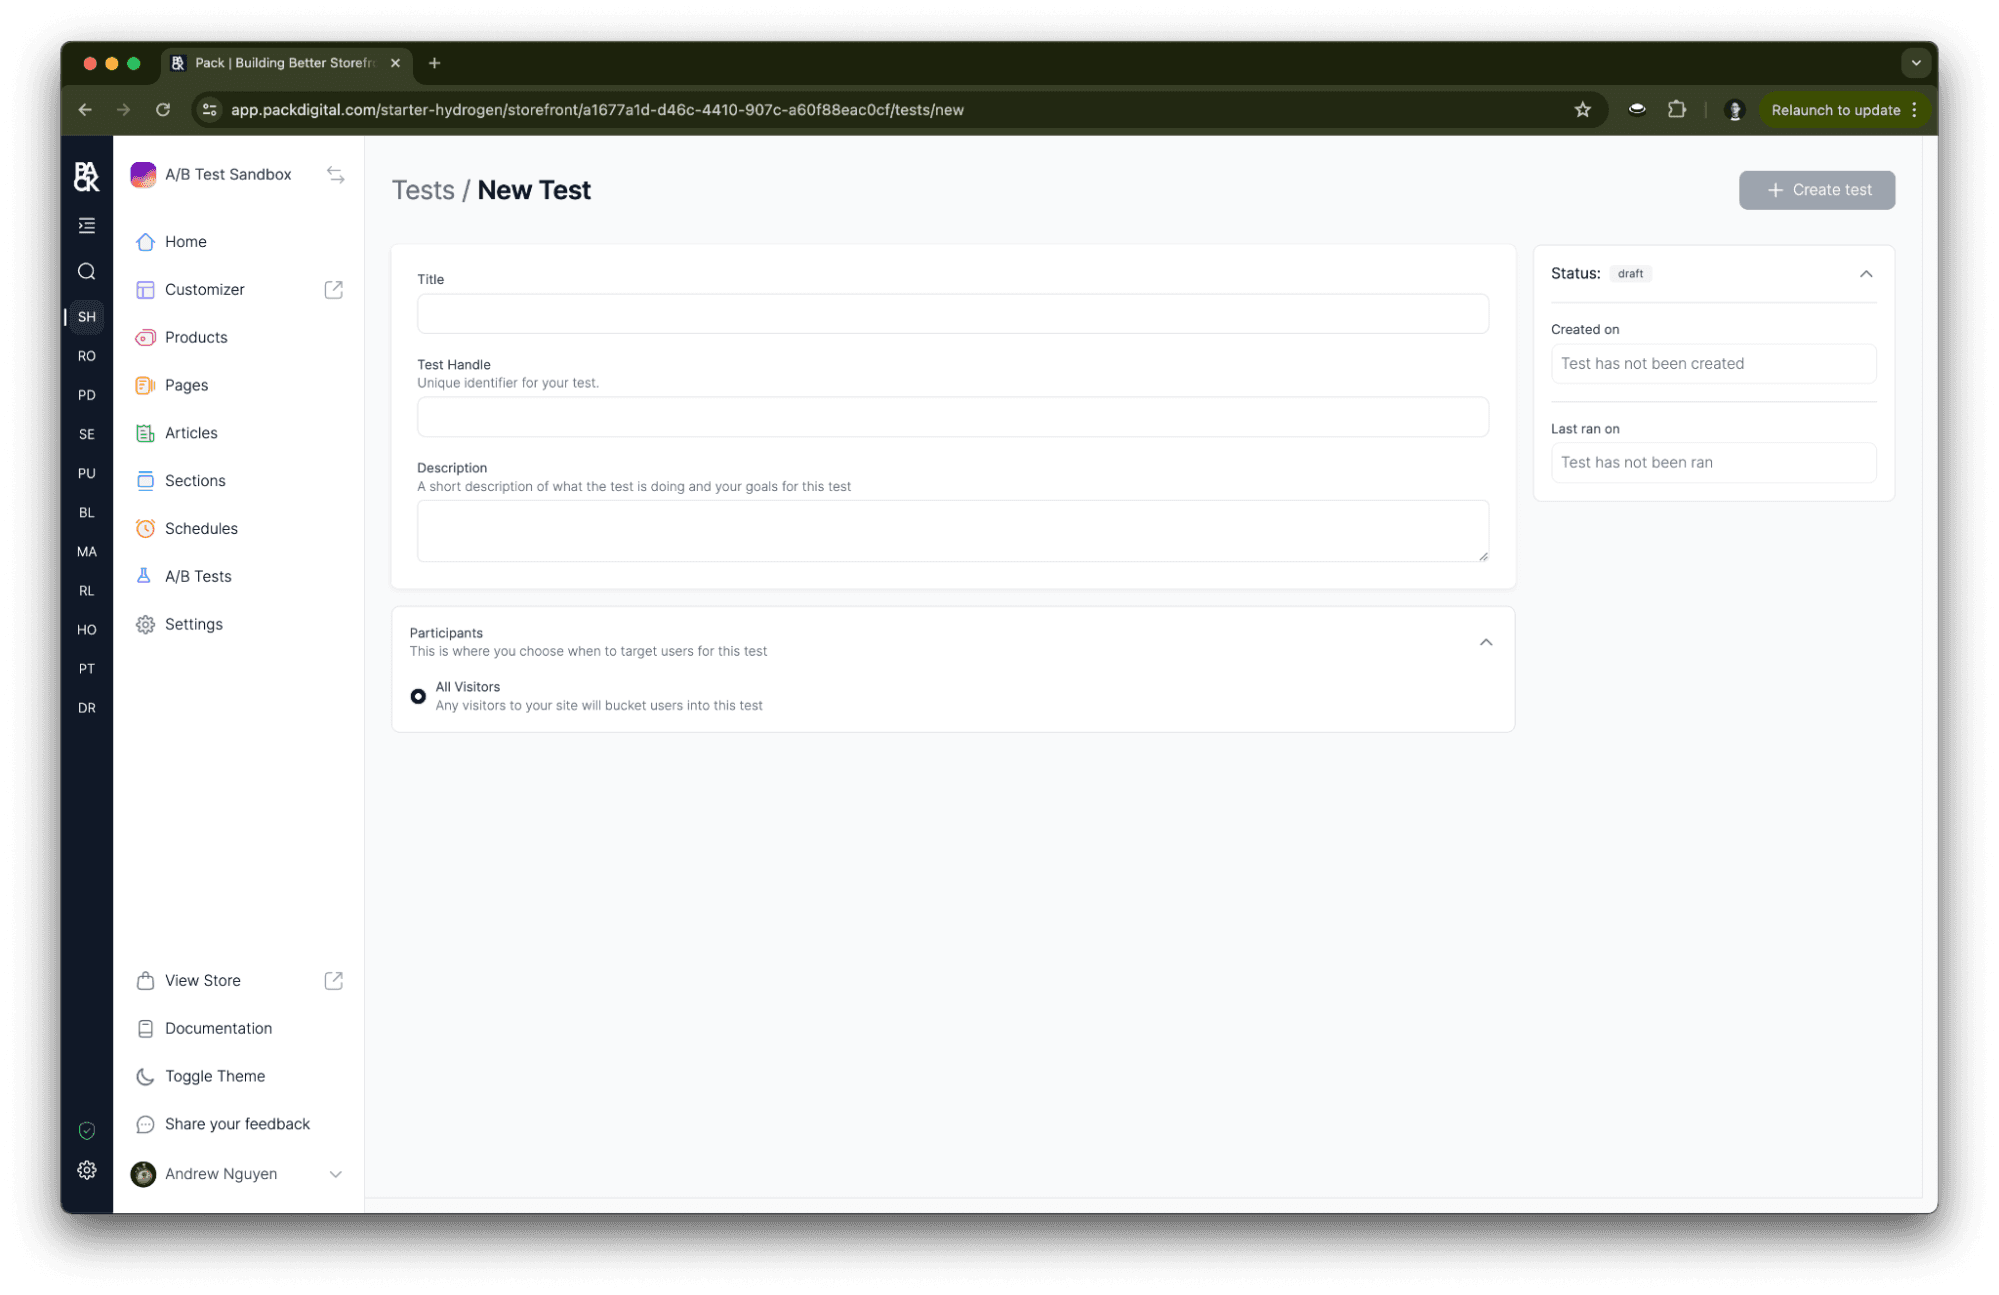
- Navigate to your Pack admin panel
- Go to A/B tests in the sidebar
- Click Create A/B test
- Enter details about your test:
- Title: The human-readable name for your test
- Test Handle: A unique key for your test, useful for analytics or feature flag testing
- Description (optional): What the test is doing and your goals for it, grounded in a hypothesis reflecting your desired outcome
- Impression trigger: When a visitor's impression is counted. See Impression triggers.
- Targeting: Who can enter the test: All eligible traffic, Match inline rules, or Use a saved audience
- Click Save A/B test in the top right corner.
Managing test variants
Once a test is created, you can edit and manage its variants. By default, when a test is created, we provide two variants: a control variant and variant B. These variants have a 50/50 traffic split by default.
When using Pack, you can tweak your test and its variants even while it's running. Just remember, if you make changes to an active test, it's crucial to understand how those changes might impact your test results.
Editing a variant
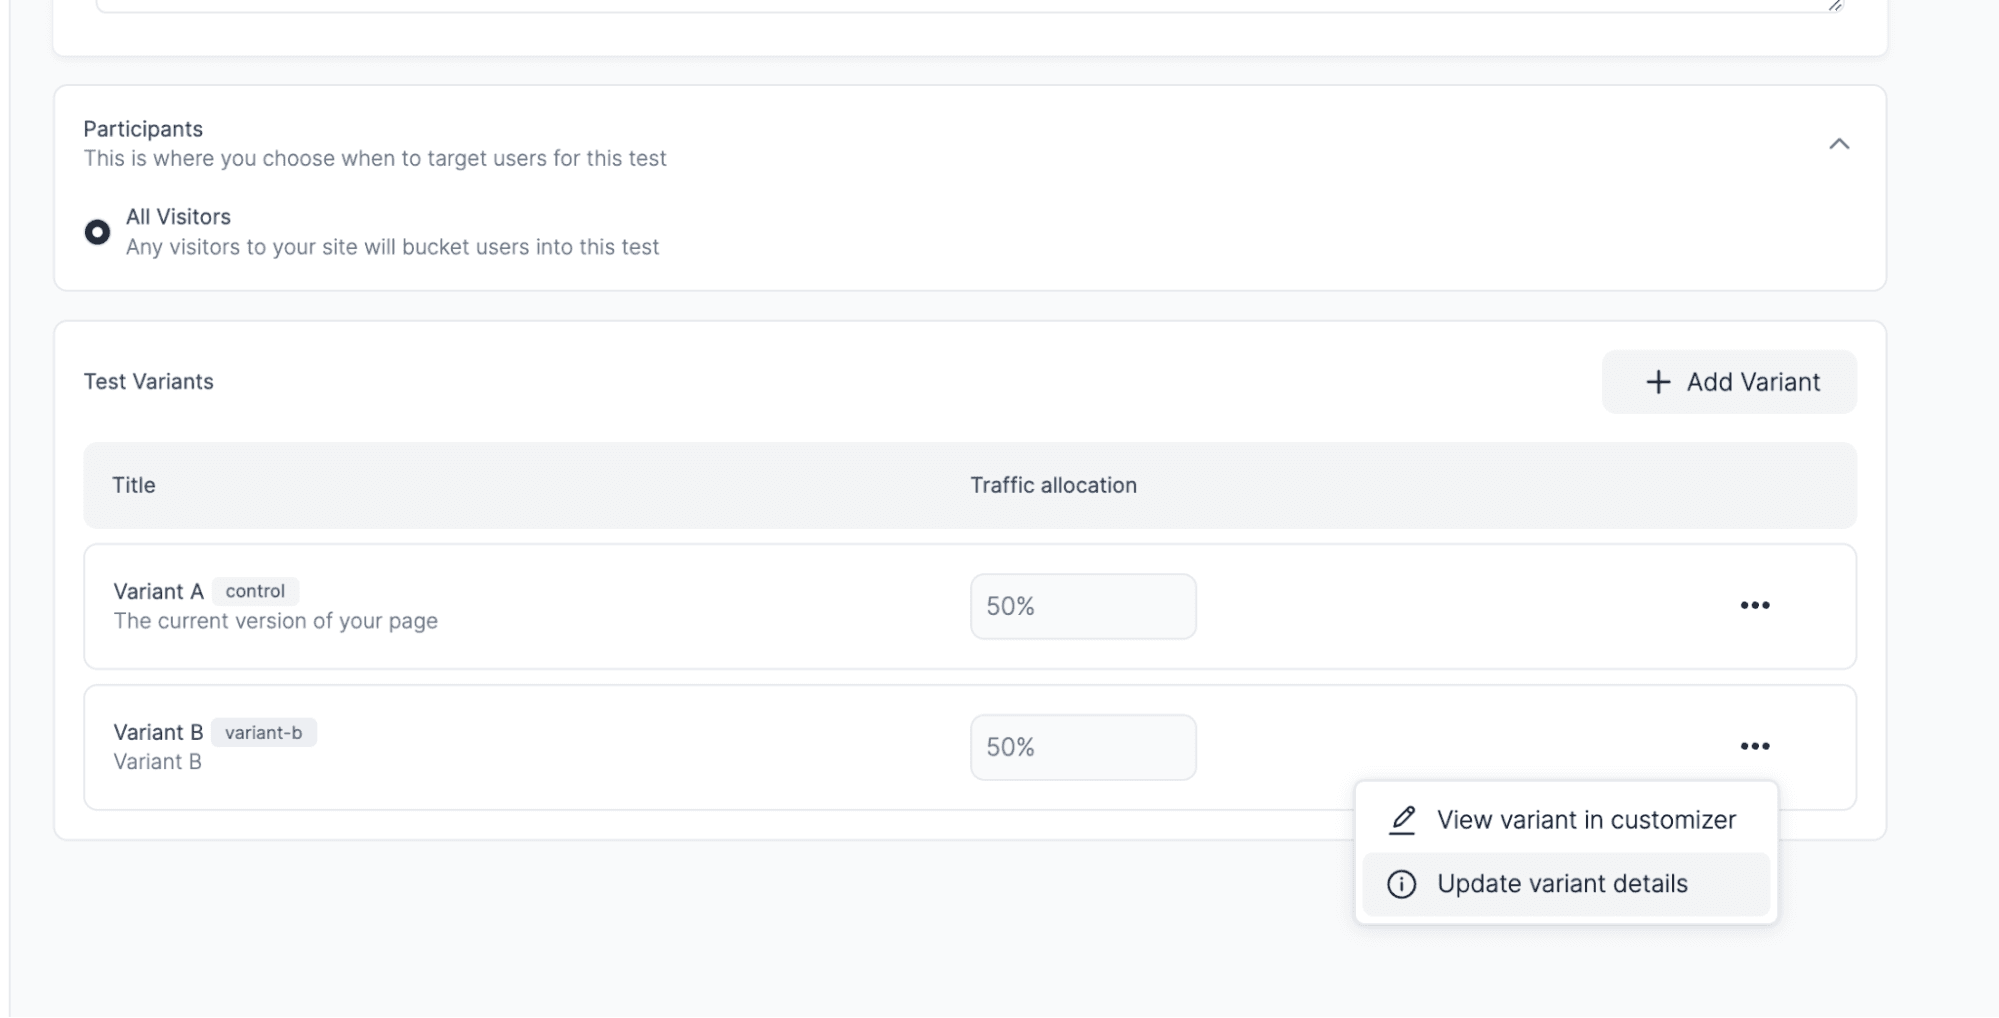
From the test view, click the action menu on the right side of the variant and select Update variant details.
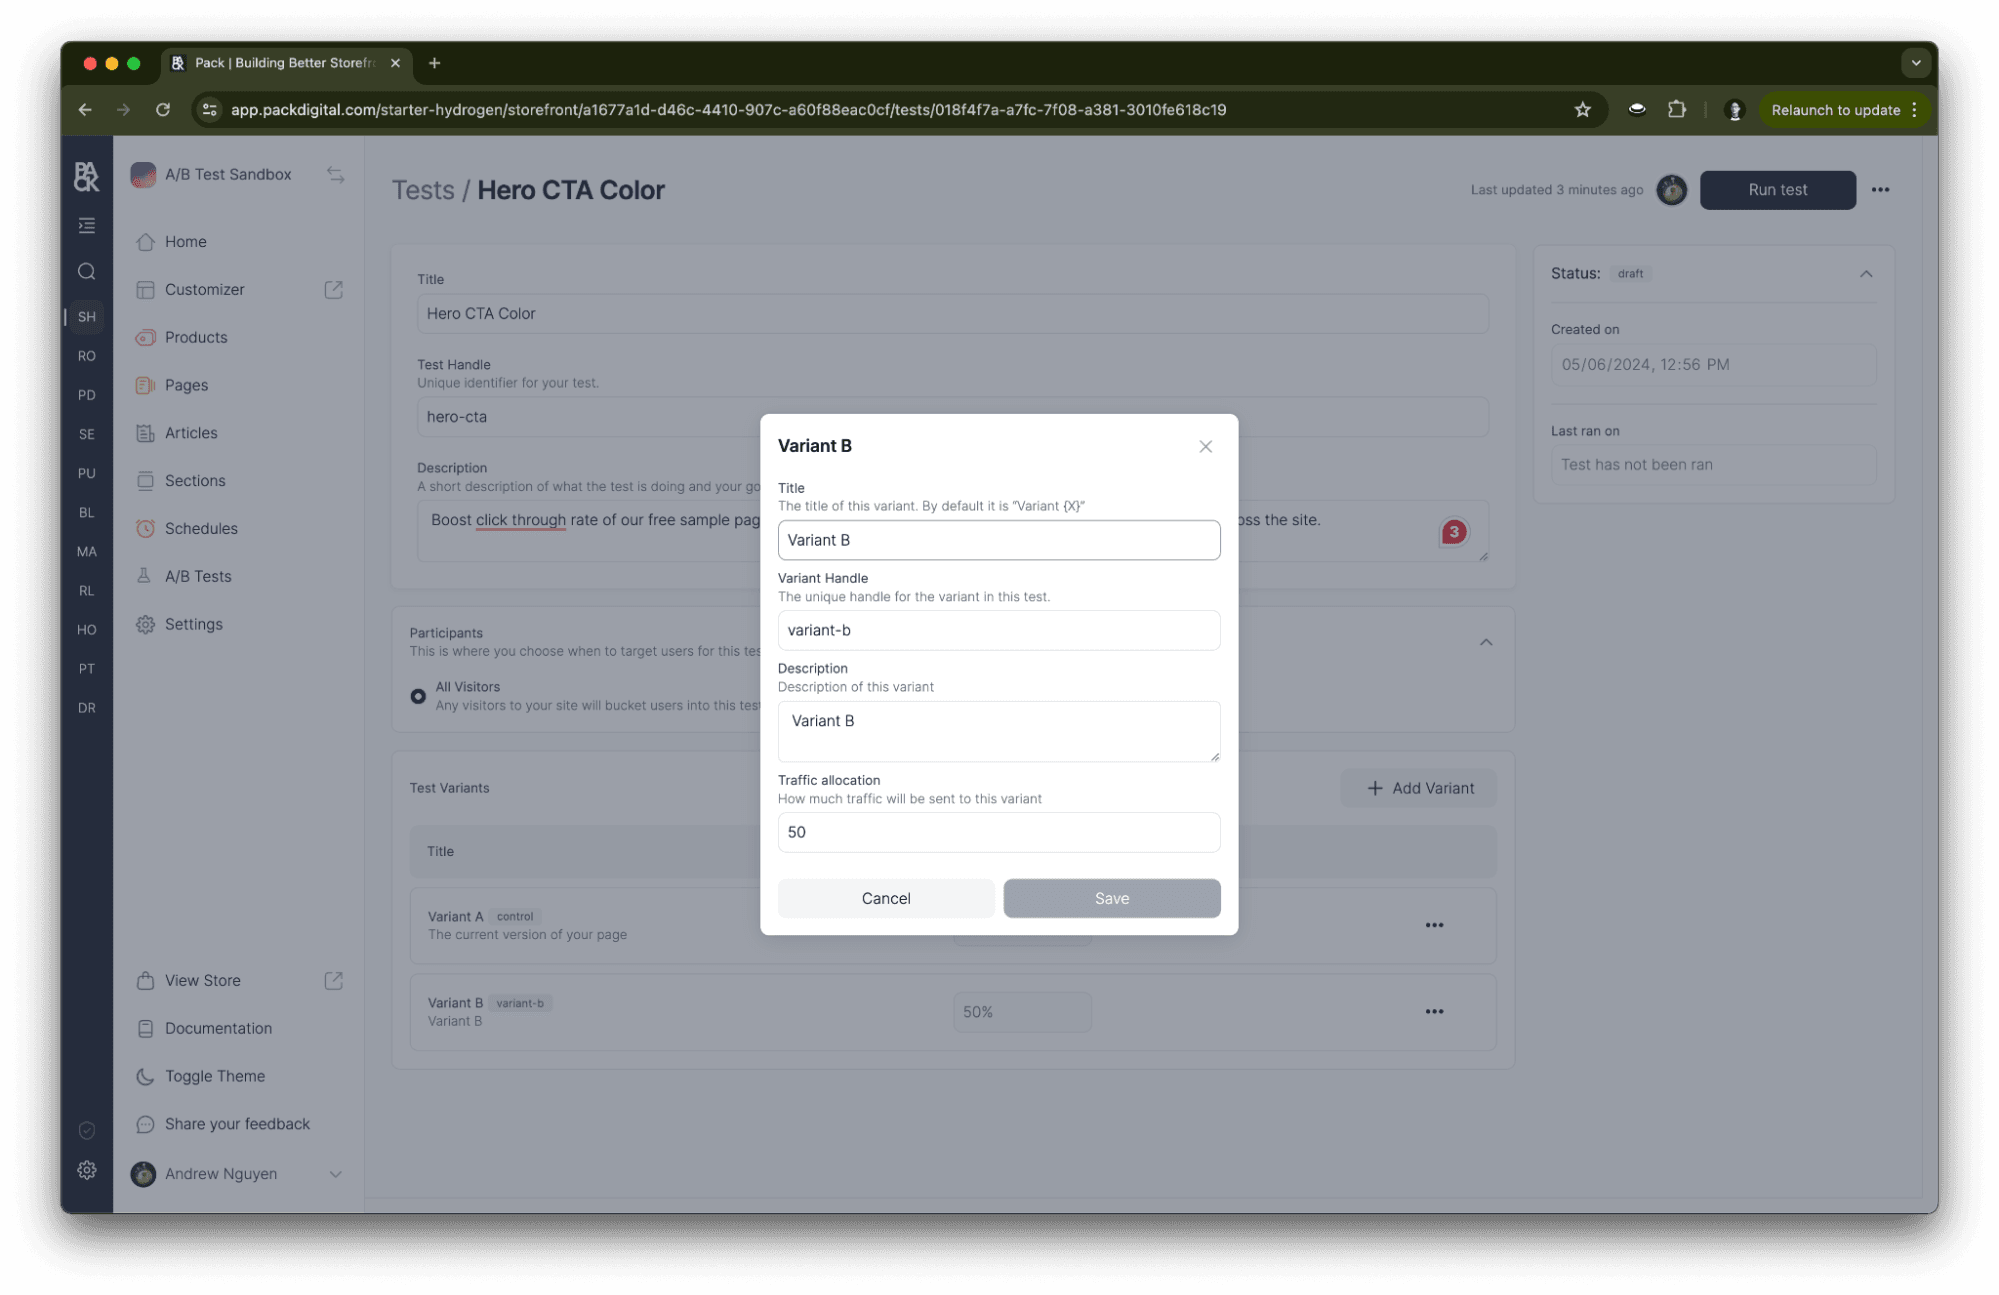
From here, you can update information about the variant:
- Title: The name for the variant, which can be customized
- Variant Handle: A unique key for the variant, used for analytics or feature flag testing and as the identifier when users are bucketed into a test
- Description: An optional field to describe the intent or changes the variant is supposed to have
- Traffic allocation: Control how traffic is distributed between variants in this test
Adding additional test variants
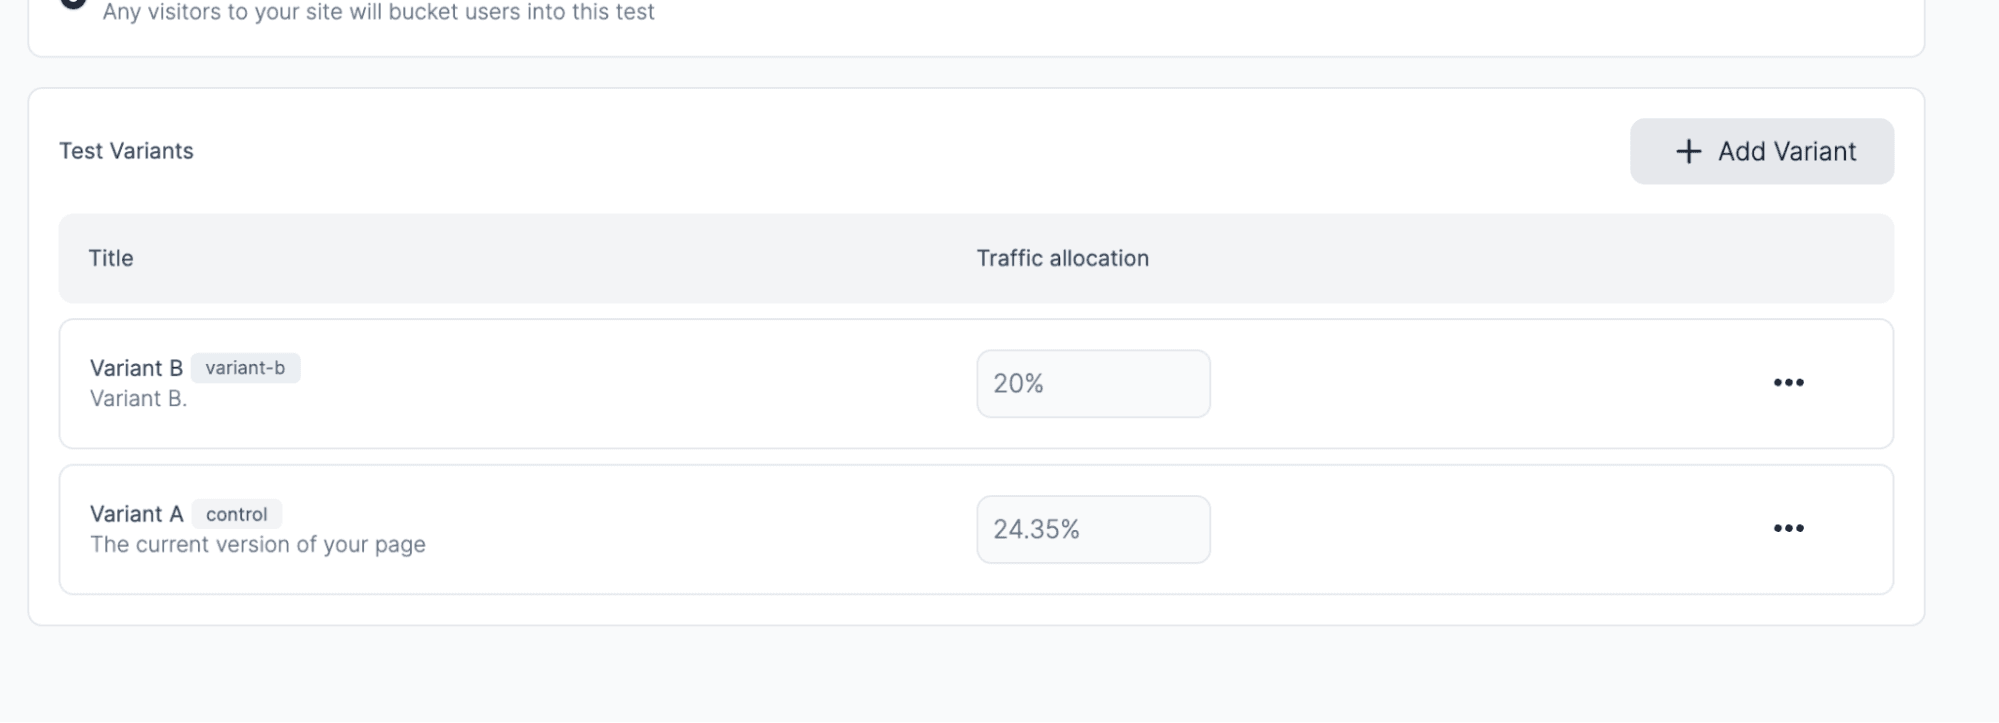
Pack’s A/B testing allows you to add additional variants to an A/B test, enabling you to run A/B/n tests. To add additional test variants:
- Visit your test
- In the Variants card, click Add variant
Deleting test variants
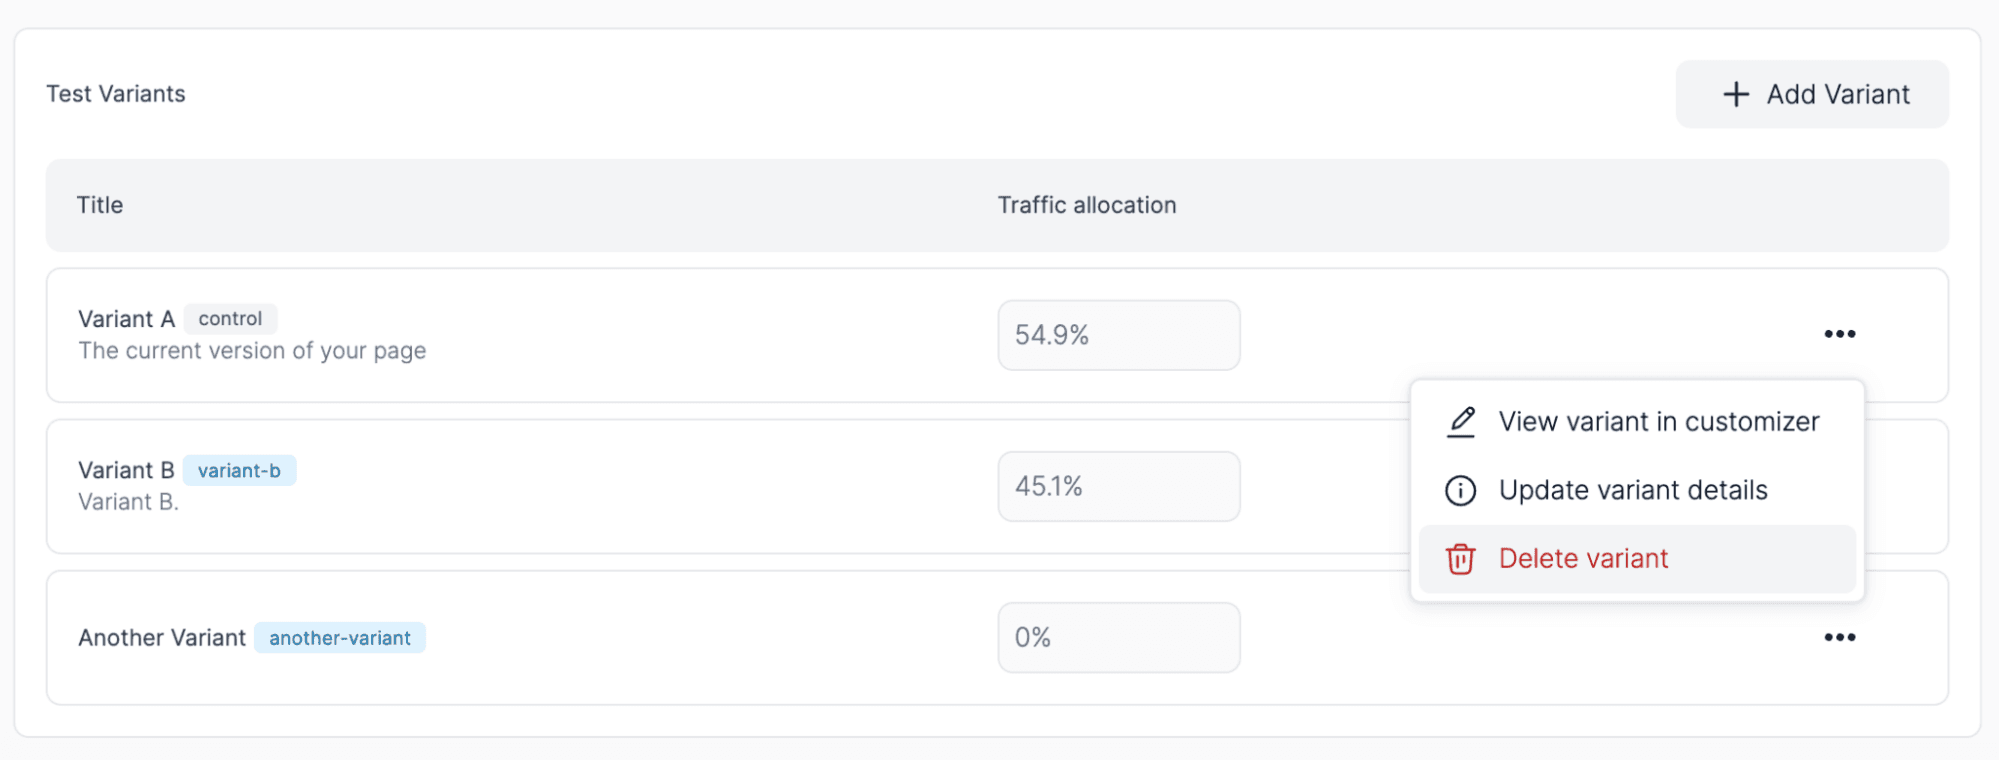
If you want to delete a variant from a test:
- Visit your test
- In the Variants card
- Click the action menu to the right of the variant you want to delete
- Click Delete variant
- Confirm your variant deletion
If you delete a variant from an active test, users who were bucketed into this variant will be assigned to another variant in the test. Again, it’s crucial to understand how this change might impact your test results before deleting.
Impression triggers
Each test has an Impression trigger setting in its details in the admin panel that controls when a visitor's impression is counted. On page load (the default) counts the impression as soon as the page loads. On element view counts it only once the test's content scrolls into view, which is useful for tests below the fold. On element view requires @pack/hydrogen 3.1.1 or later. See Impression triggers under Add PackTestRoute to all relevant storefront routes in the implementation guide for how each mode behaves in your storefront code.
Editing content for your test
Once you've defined your test objective and configured your test and its variants, you're ready to edit the content for this test. Start by heading to the Customizer to begin editing your tests.
Enter Test mode
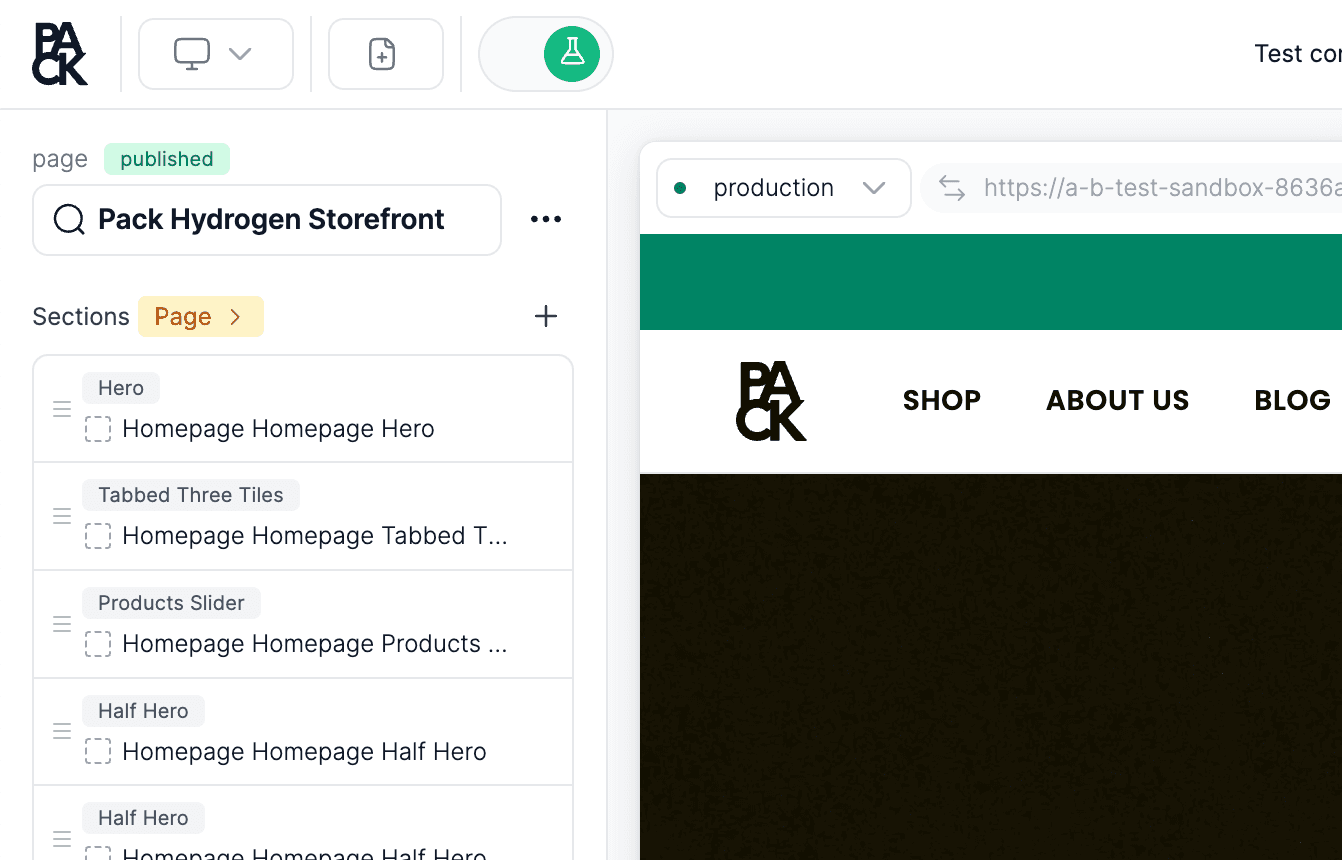
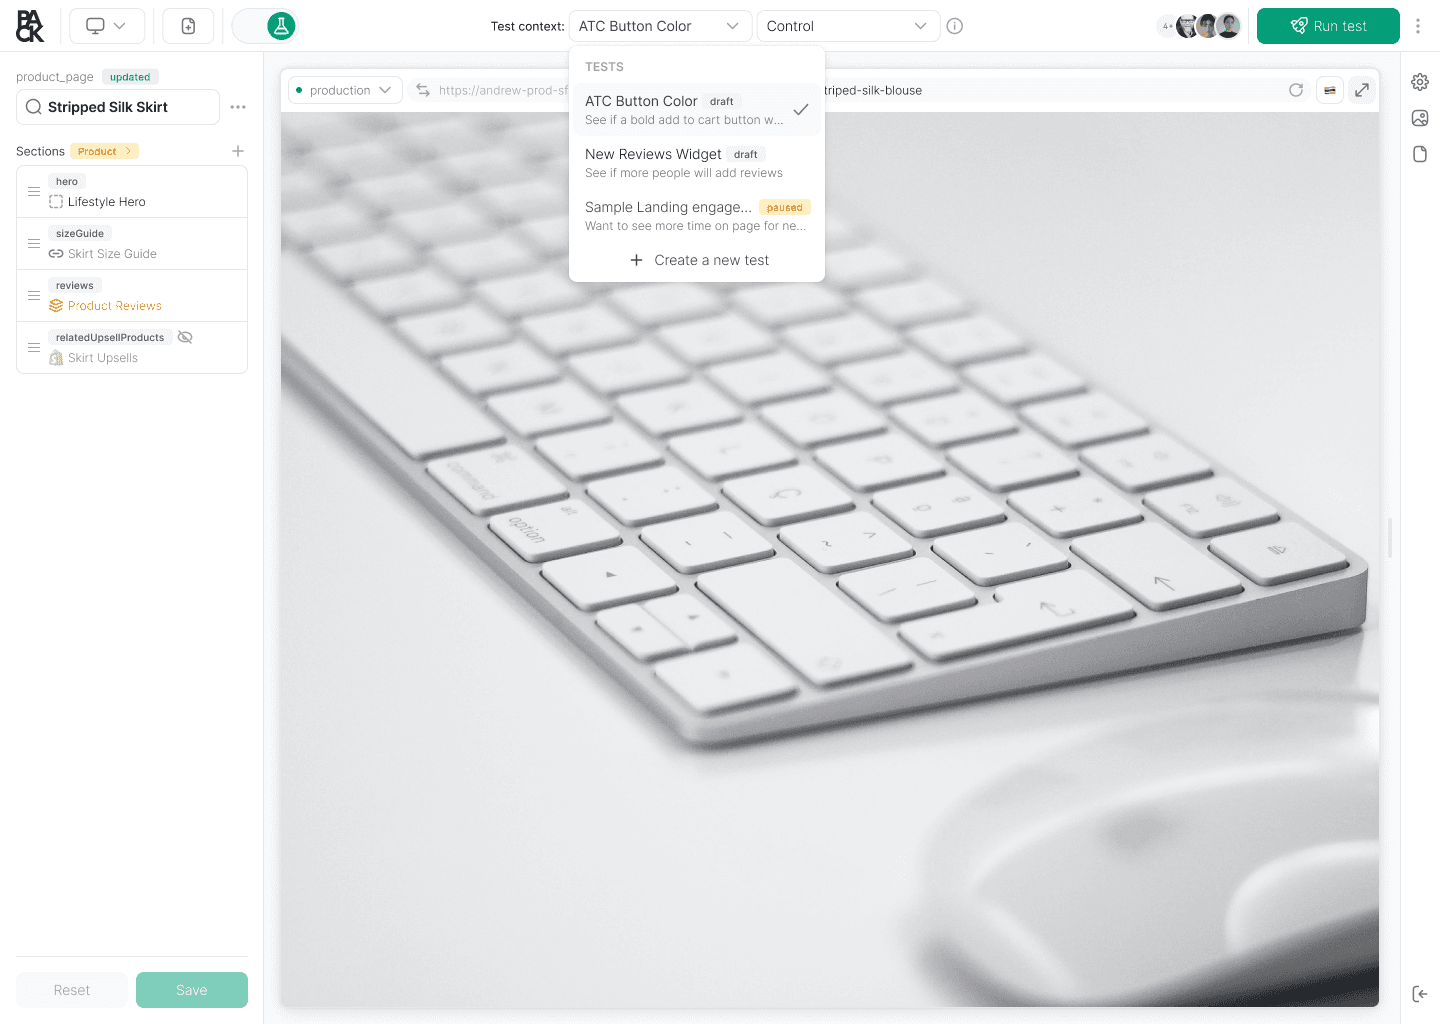
Once you are in the Customizer, enable test mode by clicking the flask icon in the top left corner of the toolbar.
In test mode, you can manage content for each test and its variants. Editing content in test mode assigns changes to the currently active variant. When visitors come to your site and are assigned a variant, they'll see the content saved for that specific test and variant.
Editing a variant’s content
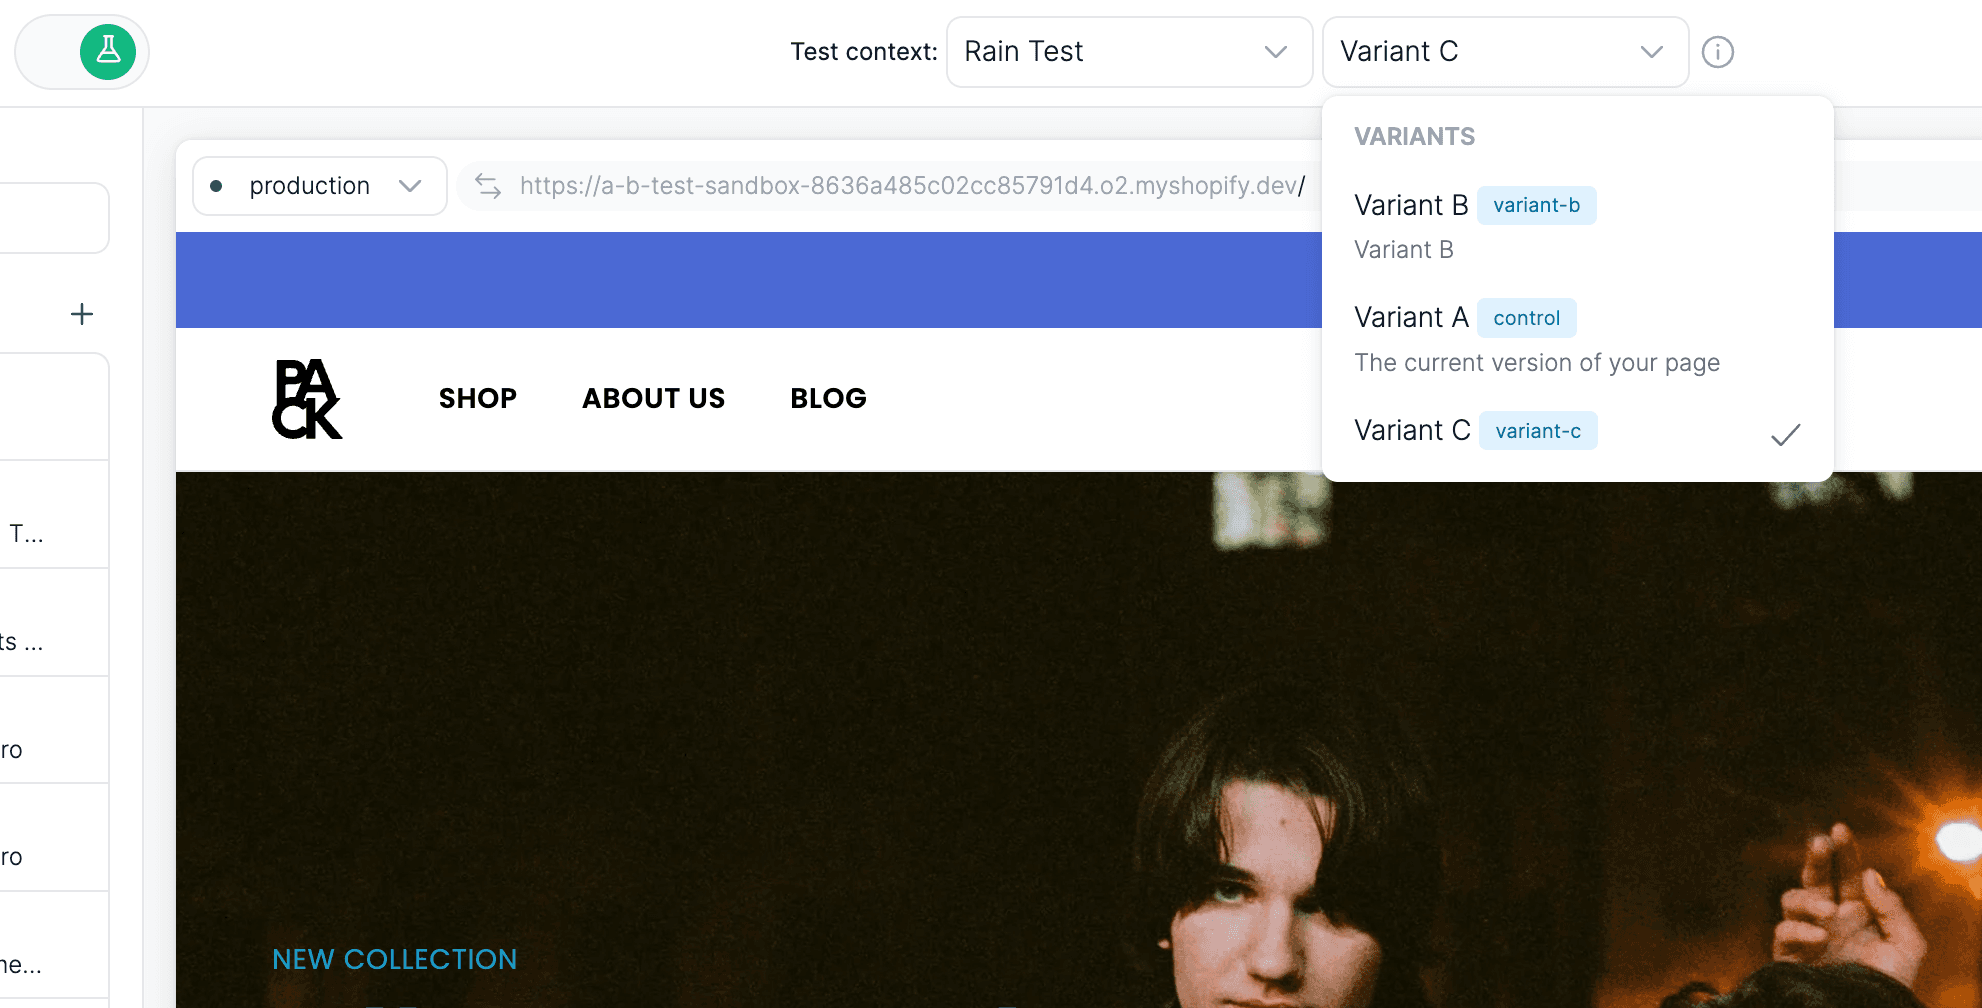
At the top of the toolbar in the customizer, in test mode, select the test and the variant you want to start editing content for.
Changes made to this content will be saved to the variant:
- Changes on a page level
- Adding new sections
- Removing sections
- Section templates
- Changes on a global level
- Site settings
- Linked sections or changes to section templates will update wherever they are referenced
When you are outside of test mode, you are editing the control content of that page. Because you can run multiple tests at the same time, it’s important to note that if you edit the control content that is the control in multiple tests while outside of test mode, this may affect your test results.
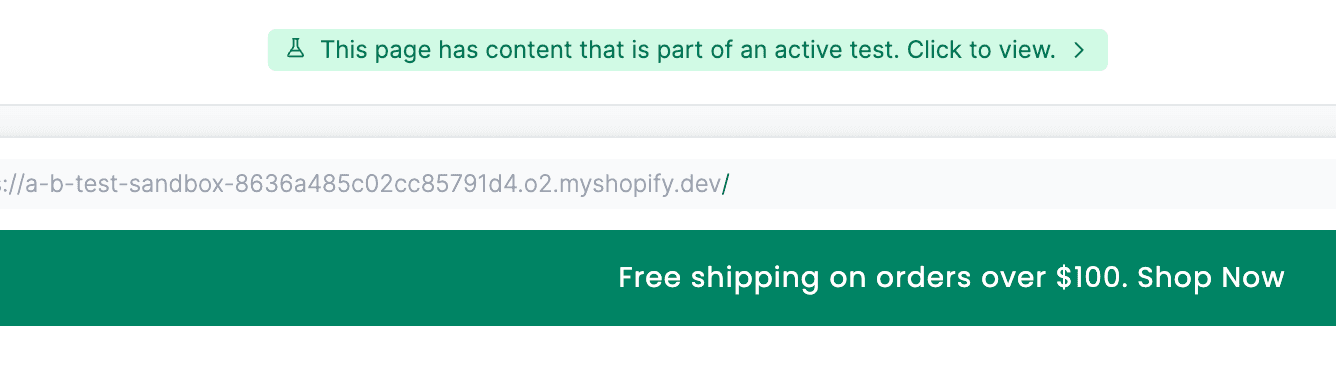
The customizer will give you a small notice in the top toolbar if content is part of multiple active tests to help prevent unintentional changes during testing.
Starting, pausing, and ending tests
Starting a test
When you’re ready to start your test, you can do it in the admin panel or the customizer.
- To start a test from the admin panel:
- Go to your admin panel
- Select A/B tests in the sidebar
- Select the test you want to start
- Click Run test in the top right
- To start a test from the customizer:
- Go to your admin panel
- Select Customizer in the sidebar
- Enter test mode
- Select the test you want to start in the toolbar
- Click Run test in the top right
Pausing a test
If there is an issue or an adjustment needed and you need to pause the test, you can do so in the admin panel or customizer.
- To pause a test from the admin panel:
- Go to your admin panel
- Select A/B tests in the sidebar
- Select the test you want to pause
- Click Pause test in the top right
- To pause a test from the customizer:
- Go to your admin panel
- Select Customizer in the sidebar
- Enter test mode
- Select the test you want to pause in the toolbar
- Click Pause test in the top right
Ending a test
When you want to end a test, you can do so in the admin panel or customizer.
- To end a test from the admin panel:
- Go to your admin panel
- Select A/B tests in the sidebar
- Select the test you want to end
- Click the action menu
in the top right
- Select End test
- To end a test from the customizer:
- Go to your admin panel
- Select Customizer in the sidebar
- Enter test mode
- Select the test you want to end in the toolbar
- Click the dropdown arrow next to the Pause test button in the top right
- Select End test
Scheduling a test
Instead of starting or ending a test manually, you can schedule it to start and/or end automatically at a future date and time. This is useful for coordinating a test with a campaign launch or making sure a test stops on a set date.
Scheduling is available from the admin panel.
- Go to your admin panel
- Select A/B tests in the sidebar
- Select the test you want to schedule
- Open the Schedule card and set any of the following:
- Start test on — the date and time the test should automatically start. This option is only available while the test is still a draft.
- End test on — the date and time the test should automatically end.
- Timezone — the timezone the scheduled times are interpreted in.
- Click Save schedule
Once saved, the test displays a Scheduled badge. Pack checks for due tests every minute and starts or ends them automatically — refresh the page to see the test's status update after a scheduled time passes.
A few things to keep in mind:
- The variants you want to run must be published before you can schedule the test. If any variant still has unpublished content, you'll be prompted to publish it first.
- A scheduled start and end time must be in the future, and the end time must be after the start time.
- A scheduled end stops the test but does not promote a winning variant. If you want to promote a variant, end the test manually and choose to promote, or promote it afterward (see Promoting a winner).
Editing or clearing a schedule
To change the scheduled times, open the Schedule card again, adjust the values, and click Save schedule.
To remove the schedule entirely without affecting the test's current status, click the action menu in the top right and select Clear schedule. The test reverts to being started, paused, or ended manually.
Running several tests at once
On @pack/hydrogen 4.0 and later:
- A visitor joins every test they qualify for. Each running test reaches its whole audience, rather than splitting visitors between tests.
- Tests apply to the content they change. A navigation test and a product page test can both apply on the same page.
- Two tests never change the same content for one visitor. When two tests would, the visitor sees only one of them there. Which one is fixed per visitor, and across all visitors the traffic splits between the tests.
Tests change the same content when they change the same kind of content, not only the same page: both change pages, both change products, and so on. An edit to a section counts as changing every kind of page content, so two tests that edit sections on different pages still exclude each other. Give each test targeting for the pages it changes: tests whose targeting never matches the same page do not compete. The same applies to personalizations, which are shown instead of an A/B test they overlap. See Personalization.
On earlier versions, each visitor is placed into only one of the running tests.
If your storefront chooses variant code with the A/B Testing API hooks, pass the handle of the test you mean. A visitor in several tests can otherwise read the wrong one.
Promoting a winner
Once you've completed your test and identified a winning variant, you can promote this successful version to become the new content displayed to your users.
- To promote a test from the admin panel:
- Go to your admin panel
- Select A/B tests in the sidebar
- Select the test you want to promote
- Click the action menu in the top right
- Select End test
- To promote a test from the customizer:
- Go to your admin panel
- Select Customizer in the sidebar
- Enter test mode
- Select the test you want to promote in the toolbar
- Click the dropdown arrow next to the Pause test button in the top right
- Select End test & promote variant
Manually bucketing yourself into a test
If you want to bucket yourself into a test to validate that everything is working, you can add these query parameters to the URL.
- Name
test_handle- Type
- string
- Description
The handle of the test. Also accepted as
testHandleortest-handle.
- Name
test_id- Type
- string
- Description
The id of the test. Use this or
test_handle. Also accepted astestIdortest-id.
- Name
test_variant_handle- Type
- string
- Description
The handle of the variant to show, such as
controlorvariant-b. Also accepted astestVariantHandleortest-variant-handle.
- Name
test_variant_id- Type
- string
- Description
The id of the variant to show. Use this or
test_variant_handle. Also accepted astestVariantIdortest-variant-id.
Note: The only requirement is that you include both a test_* and variant_* parameter so we know which test and variant to display.
You can use different combinations of the parameters, such as:
?test_handle=ZZZ&test_variant_handle=YYY?test_id=ZZZ&test_variant_id=YYY?test_handle=ZZZ&test_variant_id=YYY?test_id=ZZZ&test_variant_handle=YYY
Resources
A/B Testing API
Hooks for reading which A/B tests and variants a visitor is in, plus manual bucketing for QA.