Metaobjects: Implementing custom data models with Pack and Hydrogen
Metaobjects in Shopify empower merchants to define and manage custom data models on their storefronts or shops.
Metaobjects facilitate the addition and storage of structured data within the storefront or shop. These custom data models are vital for dynamically integrating content like product specifications, artist bios, and more across various site pages, ensuring consistency and streamlined management.
Use Cases
Metaobjects are ideal for content that demands uniformity and minimal updates.
Common use cases for metaobjects include:
- Artist/designer profiles
- Size charts
- Product specifications
- Ingredient lists
- Manufacturing information
- Content blocks for landing pages
These applications demonstrate the utility of metaobjects in maintaining content consistency.
Implementation Process
Implementing metaobjects in a Pack-powered Hydrogen storefront involves these key steps:
- Create the metaobject definition in Shopify
- Create metaobject entries in Shopify admin
- Create a section schema in your Pack project
- Set up data fetching in your route loaders
- Implement the component to render metaobject content
Create Metaobject Definition in Shopify
First, create your metaobject definition in Shopify:
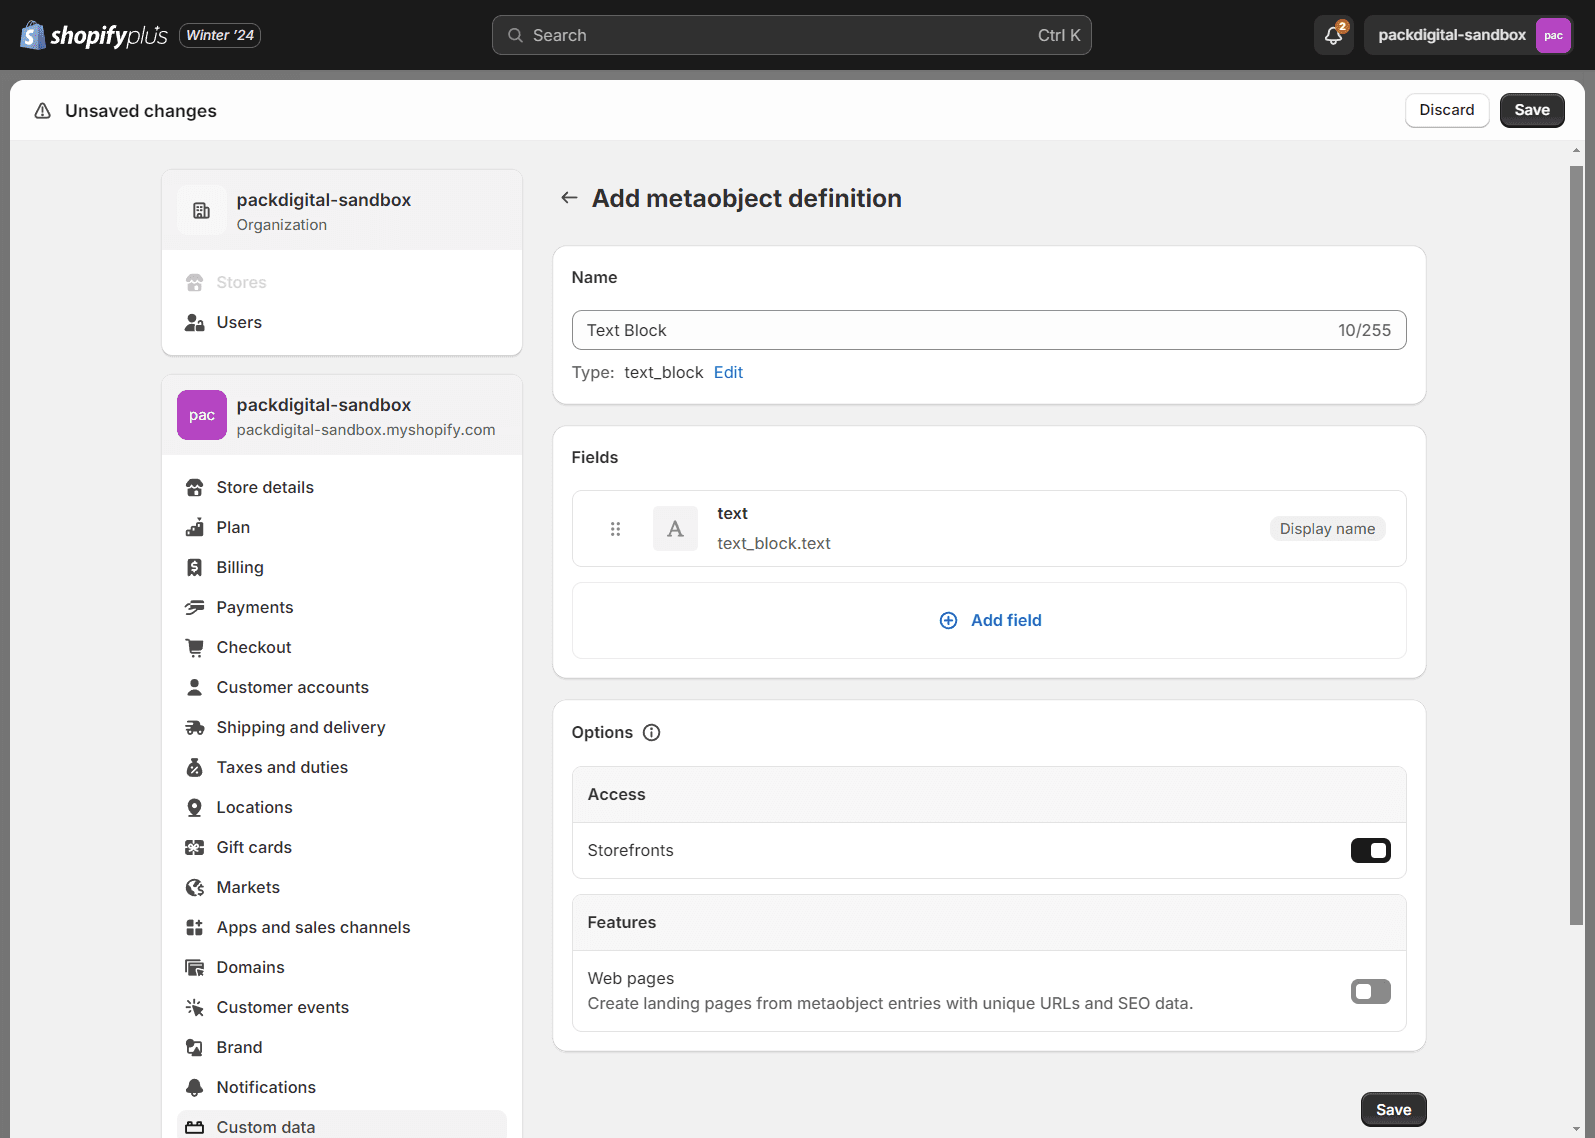
- In Shopify admin, go to Settings > Custom data (or alternatively, Content > Metaobjects)
- Click Add definition
- Fill in the fields to define your metaobject:
- Name - The name of your metaobject definition
- Fields - Add fields to define your object's structure (text, rich text, image, etc.)
- Access Options - Make sure to check "Storefronts" to make it available
- Save the definition
For more detailed instructions on creating metaobject definitions, refer to Shopify's guide on building a metaobject.
Create Metaobject Entries
The feature to add a new metaobject directly in Pack without having to go to the Shopify admin is coming soon!
Next, create entries for your metaobject definition:
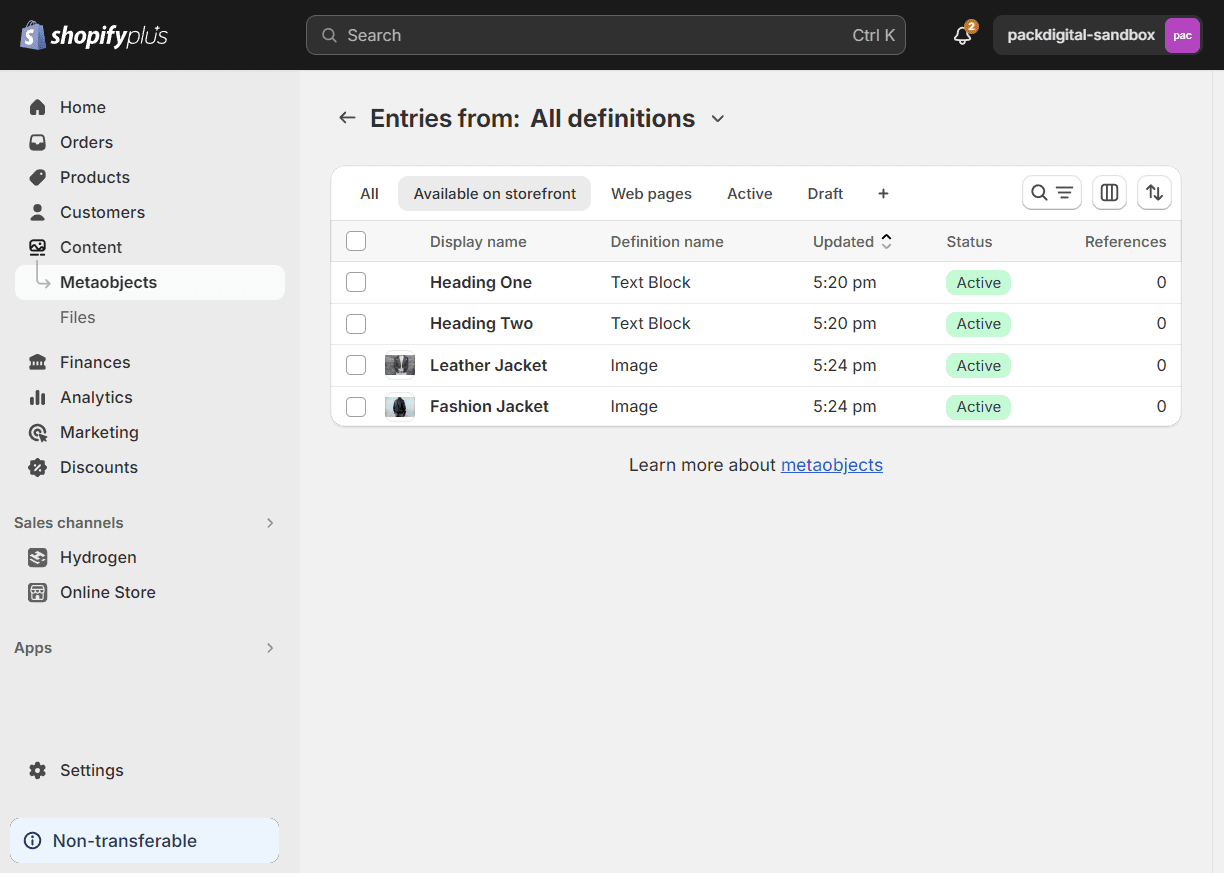
- In Shopify admin, go to Content > Metaobjects
- Click on the metaobject definition you created
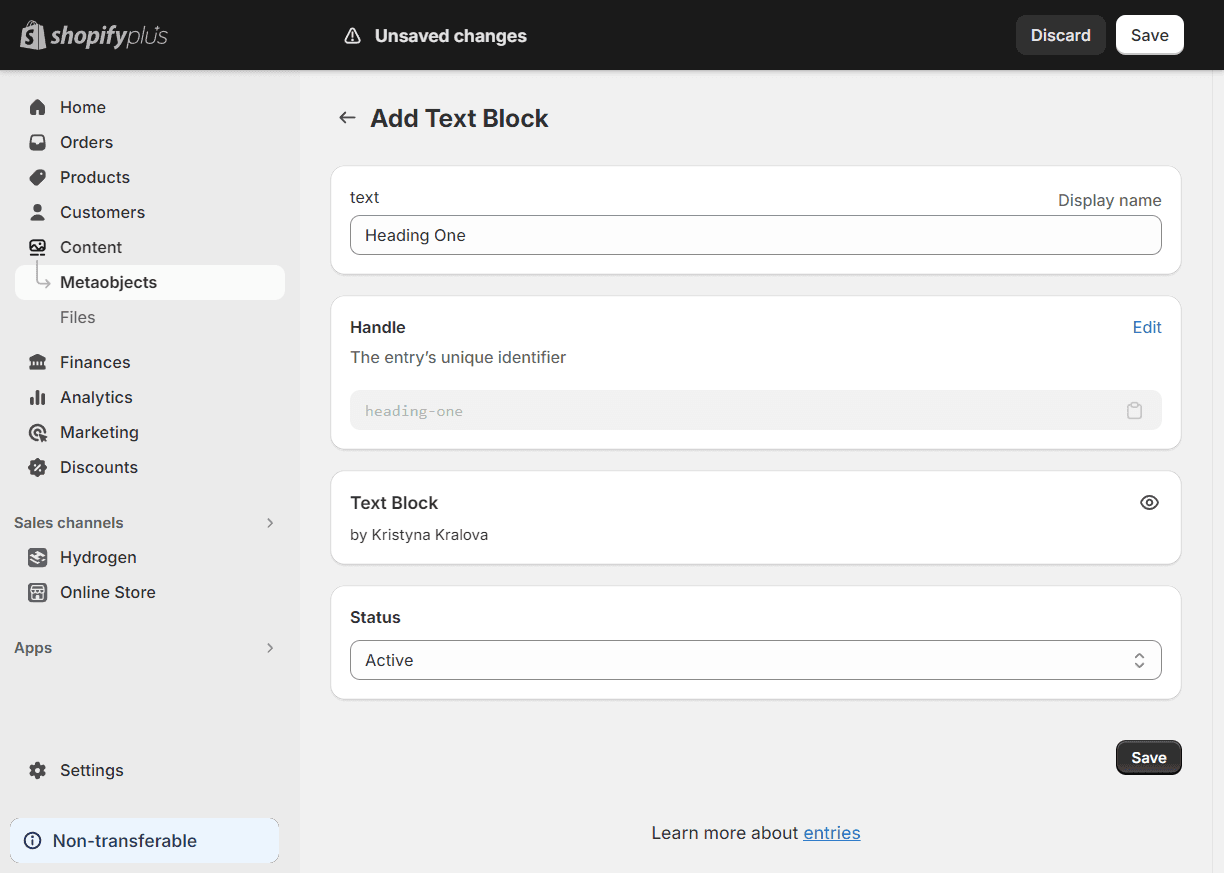
- Click Add entry
- Fill in the field values for your entry
- Save the entry
- Repeat for any additional entries you need
Create a Pack Section Schema
In your Pack project, create a section that will display your metaobject content. This involves creating a schema file that defines how Pack should interact with the metaobject data. For more details on creating schemas, refer to the Section Schema API.
- Create a new section folder in app/sections with the following structure:
-
MetaobjectTextBlock.schema.tscontaining your component's schema. UsedataSourceto pull in the metaobject data from Shopify.export function Schema() { return { category: 'Text', label: 'Text Block', key: 'metaobject-text-block', previewSrc: 'https://cdn.shopify.com/s/files/1/0671/5074/1778/files/text-block-preview.jpg?v=1675730349', dataSource: { source: 'shopify', // where the data is coming from, in this case Shopify type: 'metaobject', // what type of data it is, in this case a metaobject reference: { type: 'text_block', // what the definition is called in Shopify }, }, fields: [], } } -
MetaobjectTextBlock.tsxcontaining your component's code. You can reference thecmsprop to get the fields needed based off of what you defined in Shopify for the metaobject.export function MetaobjectTextBlock({ cms }) { const { button_link, button_link_text, heading, subtext } = cms return ( <div className="your-container-styles"> {heading && <h1>{heading}</h1>} {subtext && <div>{subtext}</div>} {button_link && <a href={button_link}>{button_link_text}</a>} </div> ) } -
index.tsexporting your new section component.export { MetaobjectTextBlock } from './MetaobjectTextBlock'
-
Register the new section in
app/sections/index.tsx:import { MetaObjectTextBlock } from './MetaObjectTextBlock' export function registerSections() { registerSection(MetaObjectTextBlock, { name: 'meta-object-text-block' }) } -
Now, when you navigate to Pack's Customizer, you should see the new metaobject section available to add to your page. Once you add the section to your page, you will have access to all the entries you created in the Shopify admin.
Use metaobject sections in Pack's Customizer
Once you've added a new metaobject section to your codebase, you can use it in Pack's Customizer to add content to your pages.
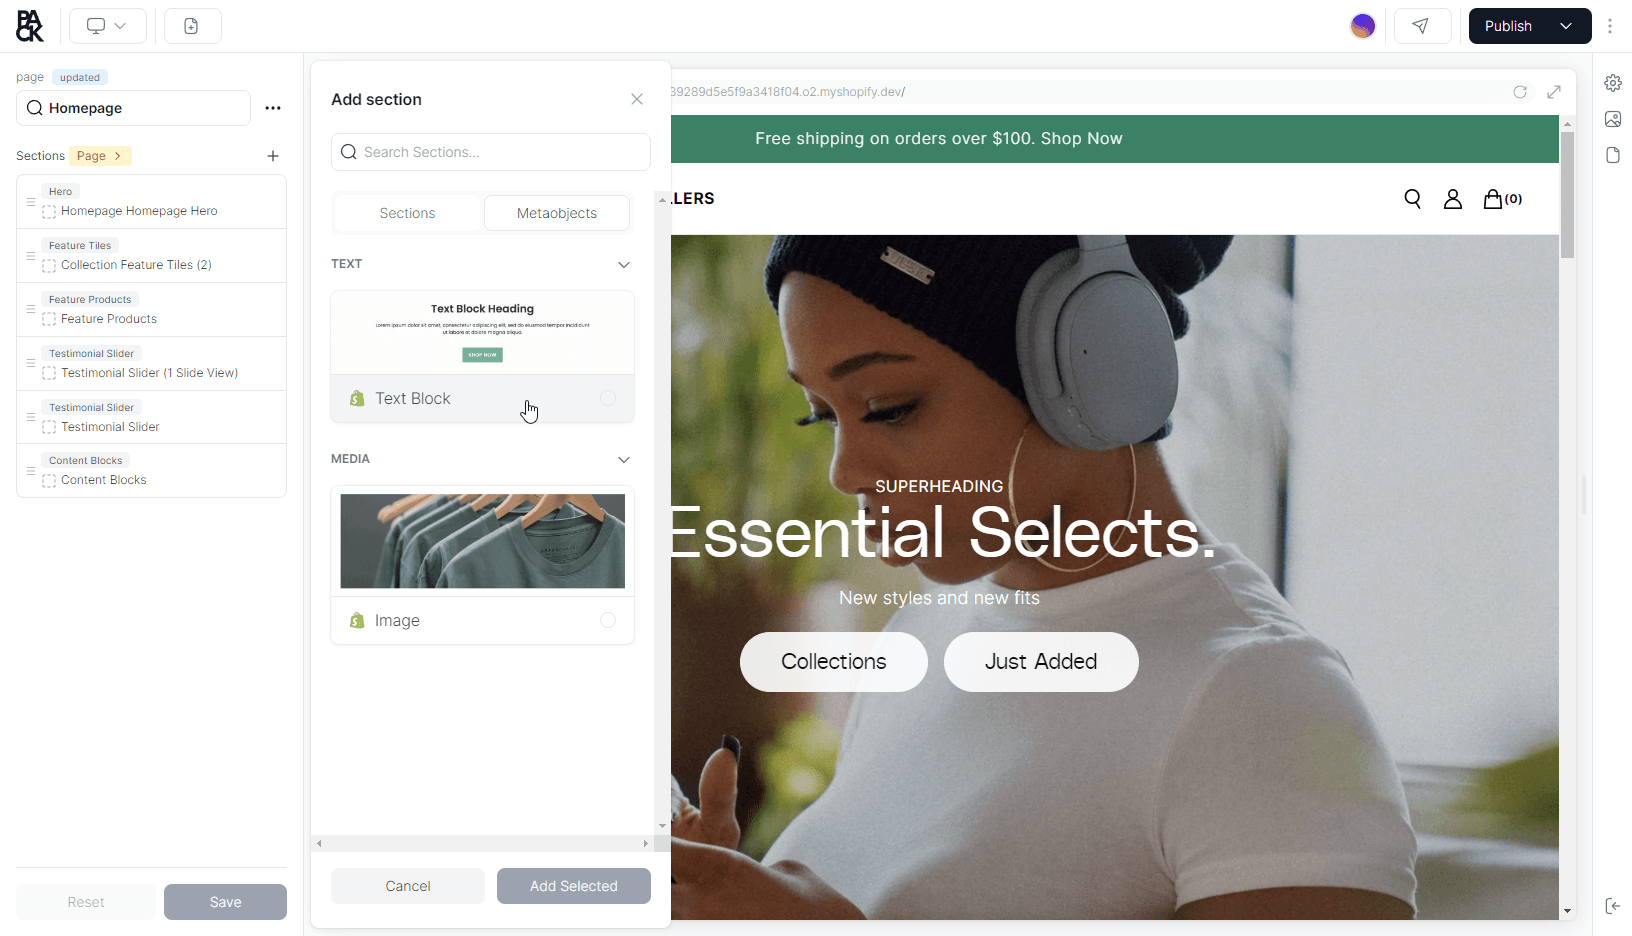
- Navigate to Pack's Customizer
- Click on + to add a new section to your page
- Select Add New Section
- Select the Metaobjects tab
- Select the metaobject section you created and click Add Selected
- Click on the newly added section to select the metaobject entry you want to display
The selected metaobject content will now display on your page. You can preview your changes using Pack's preview mode to see how they'll look on different devices before publishing.
Advanced Usage: Metaobject Collections
For more complex scenarios, you might want to display multiple metaobject entries. This is especially useful for creating team member listings, product feature comparisons, or other collection-style displays. You can modify your section schema to allow selection of multiple metaobjects:
Schema for multiple metaobjects
export function Schema() {
  return {
    category: 'Collection',
    label: 'Team Members',
    key: 'team-members',
    previewSrc: 'https://example.com/preview.jpg',
    fields: [
      {
        label: 'Heading',
        name: 'heading',
        component: 'text',
        defaultValue: 'Our Team',
      },
      {
        label: 'Team Members',
        name: 'members',
        component: 'group-list',
        itemProps: {
          label: '{{item.member.handle}}',
        },
        fields: [
          {
            name: 'member',
            component: 'metaobjectSearch',
            label: 'Team Member',
            metaobjectType: 'team_member', // Corrected from team\_member
          },
        ],
        defaultValue: [],
      },
    ],
  };
}
Usage in Routes
In your route component, you need to render sections that include metaobjects. Pack provides built-in components like RenderSections to help display your content:
Example route component
export default function PageTemplate() {
  const { page, metaobjects } = useLoaderData();

  return (
    <div className="page-template">
      {page.sections.map((section) => {
        // For metaobject sections, pass the corresponding metaobject data
        if (
          section.type === 'metaobject-text-block' &&
          section.settings?.reference?.handle
        ) {
          const metaobjectHandle = section.settings.reference.handle;
          const metaobjectData = metaobjects[metaobjectHandle];

          if (metaobjectData) {
            // Transform the metaobject fields into a more usable format
            const fieldValues = metaobjectData.fields.reduce((acc, field) => {
              acc[field.key] = field.value ? field.value : field.reference;
              return acc;
            }, {});

            return (
              <MetaobjectTextBlock
                key={section.id}
                data={fieldValues}
              />
            );
          }
        }
        // Handle other section types
        // ...
        return null;
      })}
    </div>
  );
}
Troubleshooting
Metaobject Not Appearing in Pack
If your metaobject isn't appearing in Pack's Customizer:
- Verify the metaobject type in your schema matches exactly with Shopify (including underscores)
- Check that your metaobject has the "publishable" capability enabled
- Ensure your metaobject entries are set to "Active" status
- Make sure "Storefronts" is checked in the Access Options
Field Values Not Rendering
If field values aren't displaying correctly:
- Check field types match between Shopify and your component implementation
- For reference fields (like images), make sure you're accessing the nested data correctly
- Use console logging to inspect the data structure coming from your GraphQL query
Conclusion
Metaobjects provide a powerful way to create reusable, structured content in your Pack-powered Hydrogen storefront. By following this guide, you've learned how to:
- Set up metaobject definitions in Shopify
- Create a Pack section that references metaobjects
- Fetch and display metaobject content in your routes
- Allow content editors to select metaobjects through Pack's Customizer
With these tools, you can create dynamic, maintainable content that can be updated in a single place while appearing consistently across your entire storefront.
For more information about Shopify metaobjects, refer to Shopify's official metaobjects documentation.