Content Environments: Managing Multiple Content Versions
Content environments in your space act like separate containers, allowing you to create and manage different versions of your content independently. They're like code branches, perfect for testing and development, making it easier for your team to handle content structure changes after publishing.
By default, every storefront has one default content environment known as the primary environment. Your primary environment is the one that is used for content on your storefront, unless otherwise specified.
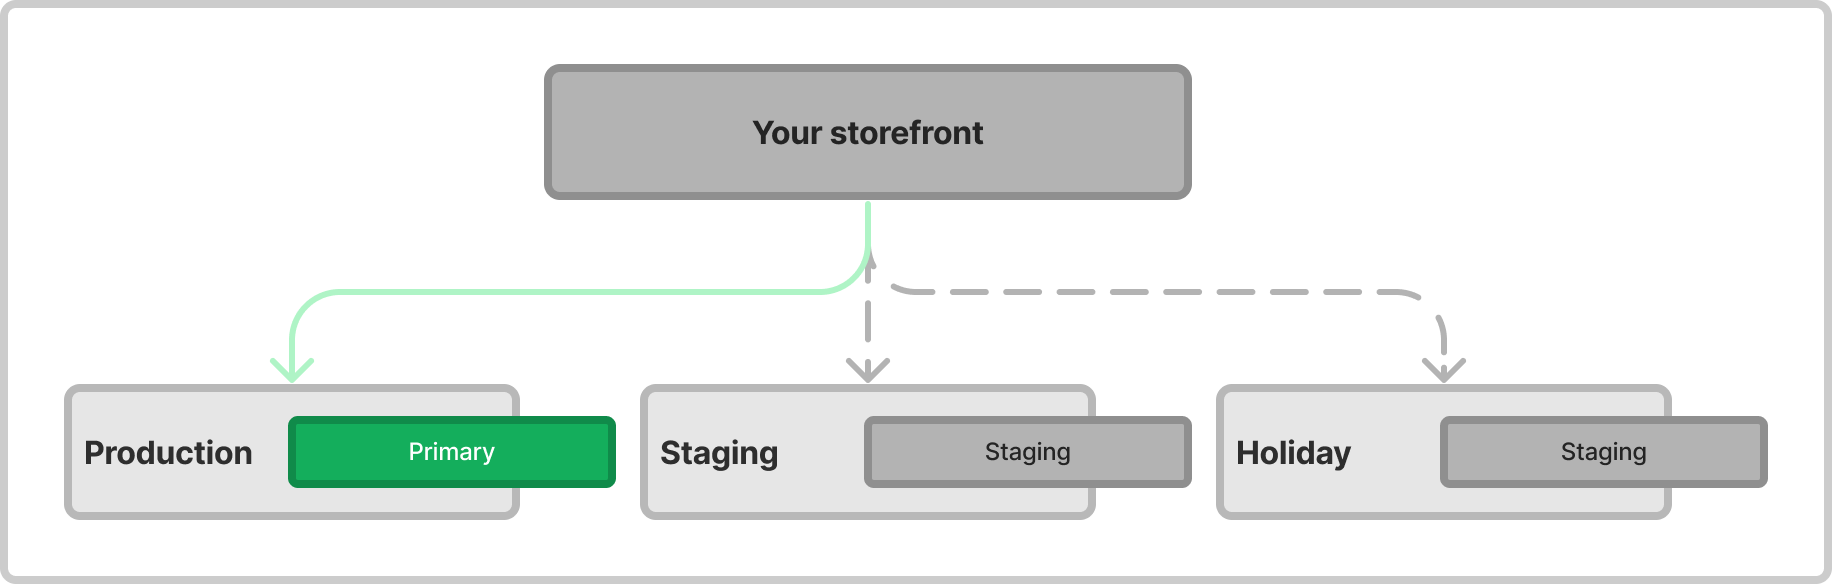
When creating a new content environment, they begin as duplicates of the primary environment, and changes made to entities within any environment, including the primary, don't impact data in other environments. Each environment operates independently, ensuring your modifications are contained and won't affect the rest.
Content environments are only available on Pack storefronts.
Content environments are crucial for managing and previewing different versions of your website's content in a controlled and isolated manner.
They are especially beneficial in development and testing phases, allowing you to experiment and make changes without impacting your live site, whether you’re creating a staging environment or preparing a holiday campaign.
Creating a new content environment
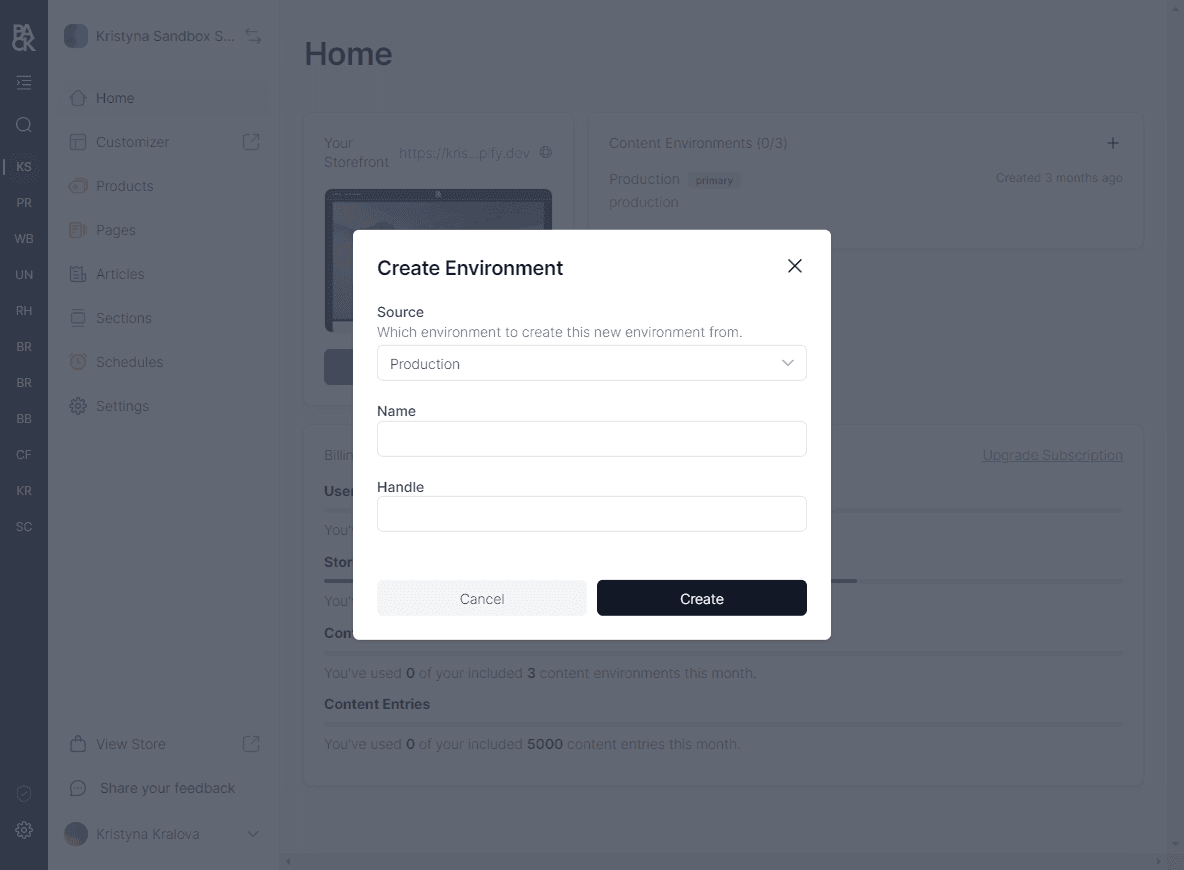
- Go to Pack’s admin > Home.
- Click on the + button next to the content environments section on the right-hand side of the dashboard.
- Select the source environment that you want to duplicate.
- Assign a name and handle to your new environment.
This process enables you to work on different versions of your content, test new features, or make changes without affecting your primary content environment.
Promoting content environments
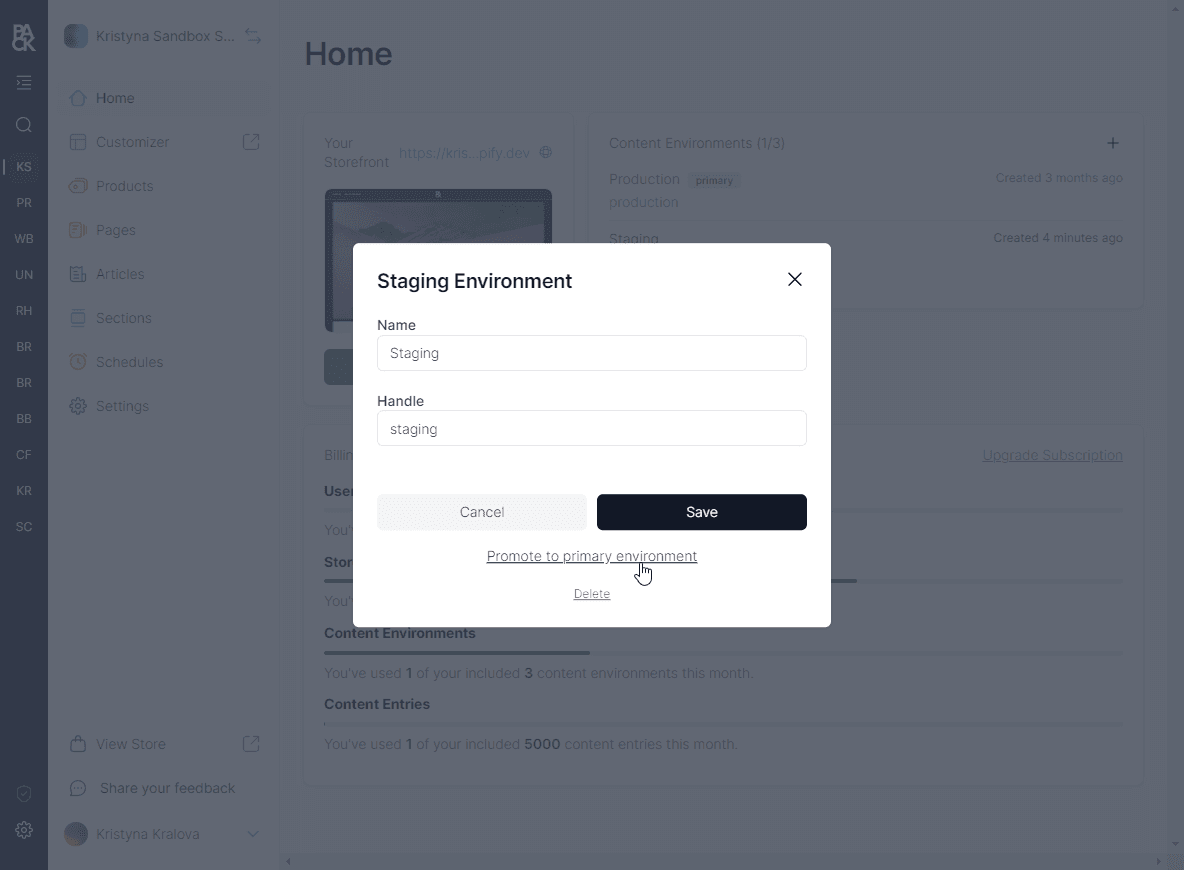
- Navigate to the desired content environment.
- Click on the Promote to Primary environment button.
Promoting an environment to be your primary environment means it becomes the default environment for your storefront, and its content will be displayed to your end-users.
Managing content environments
- Navigate to Pack’s admin > Home.
- Click on the content environment you wish to manage.
- Here, you can rename, change the handle, or delete the environment as needed.
Force storefront to use content environments
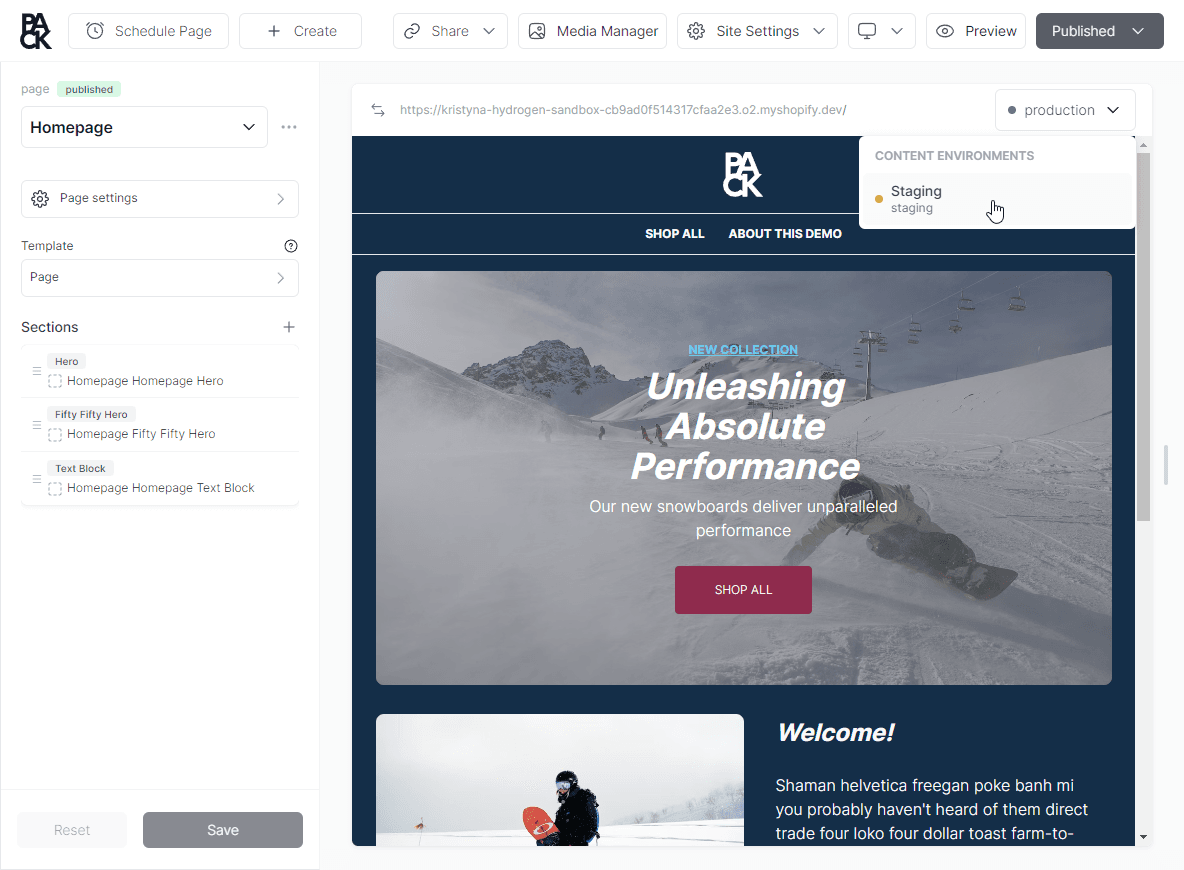
You can force the storefront to use a specific content environment by using the Content Environment toggle in the Customizer.