Pack Customizer: Visual Editing Platform for Marketers and Developers

The Customizer is Pack's visual editor for your storefront or shop that makes teamwork a breeze for both devs and content creators.
The Customizer becomes available once the storefront or shop is deployed for the first time. You can locate it in the Pack Admin's left sidebar.
Managing Content
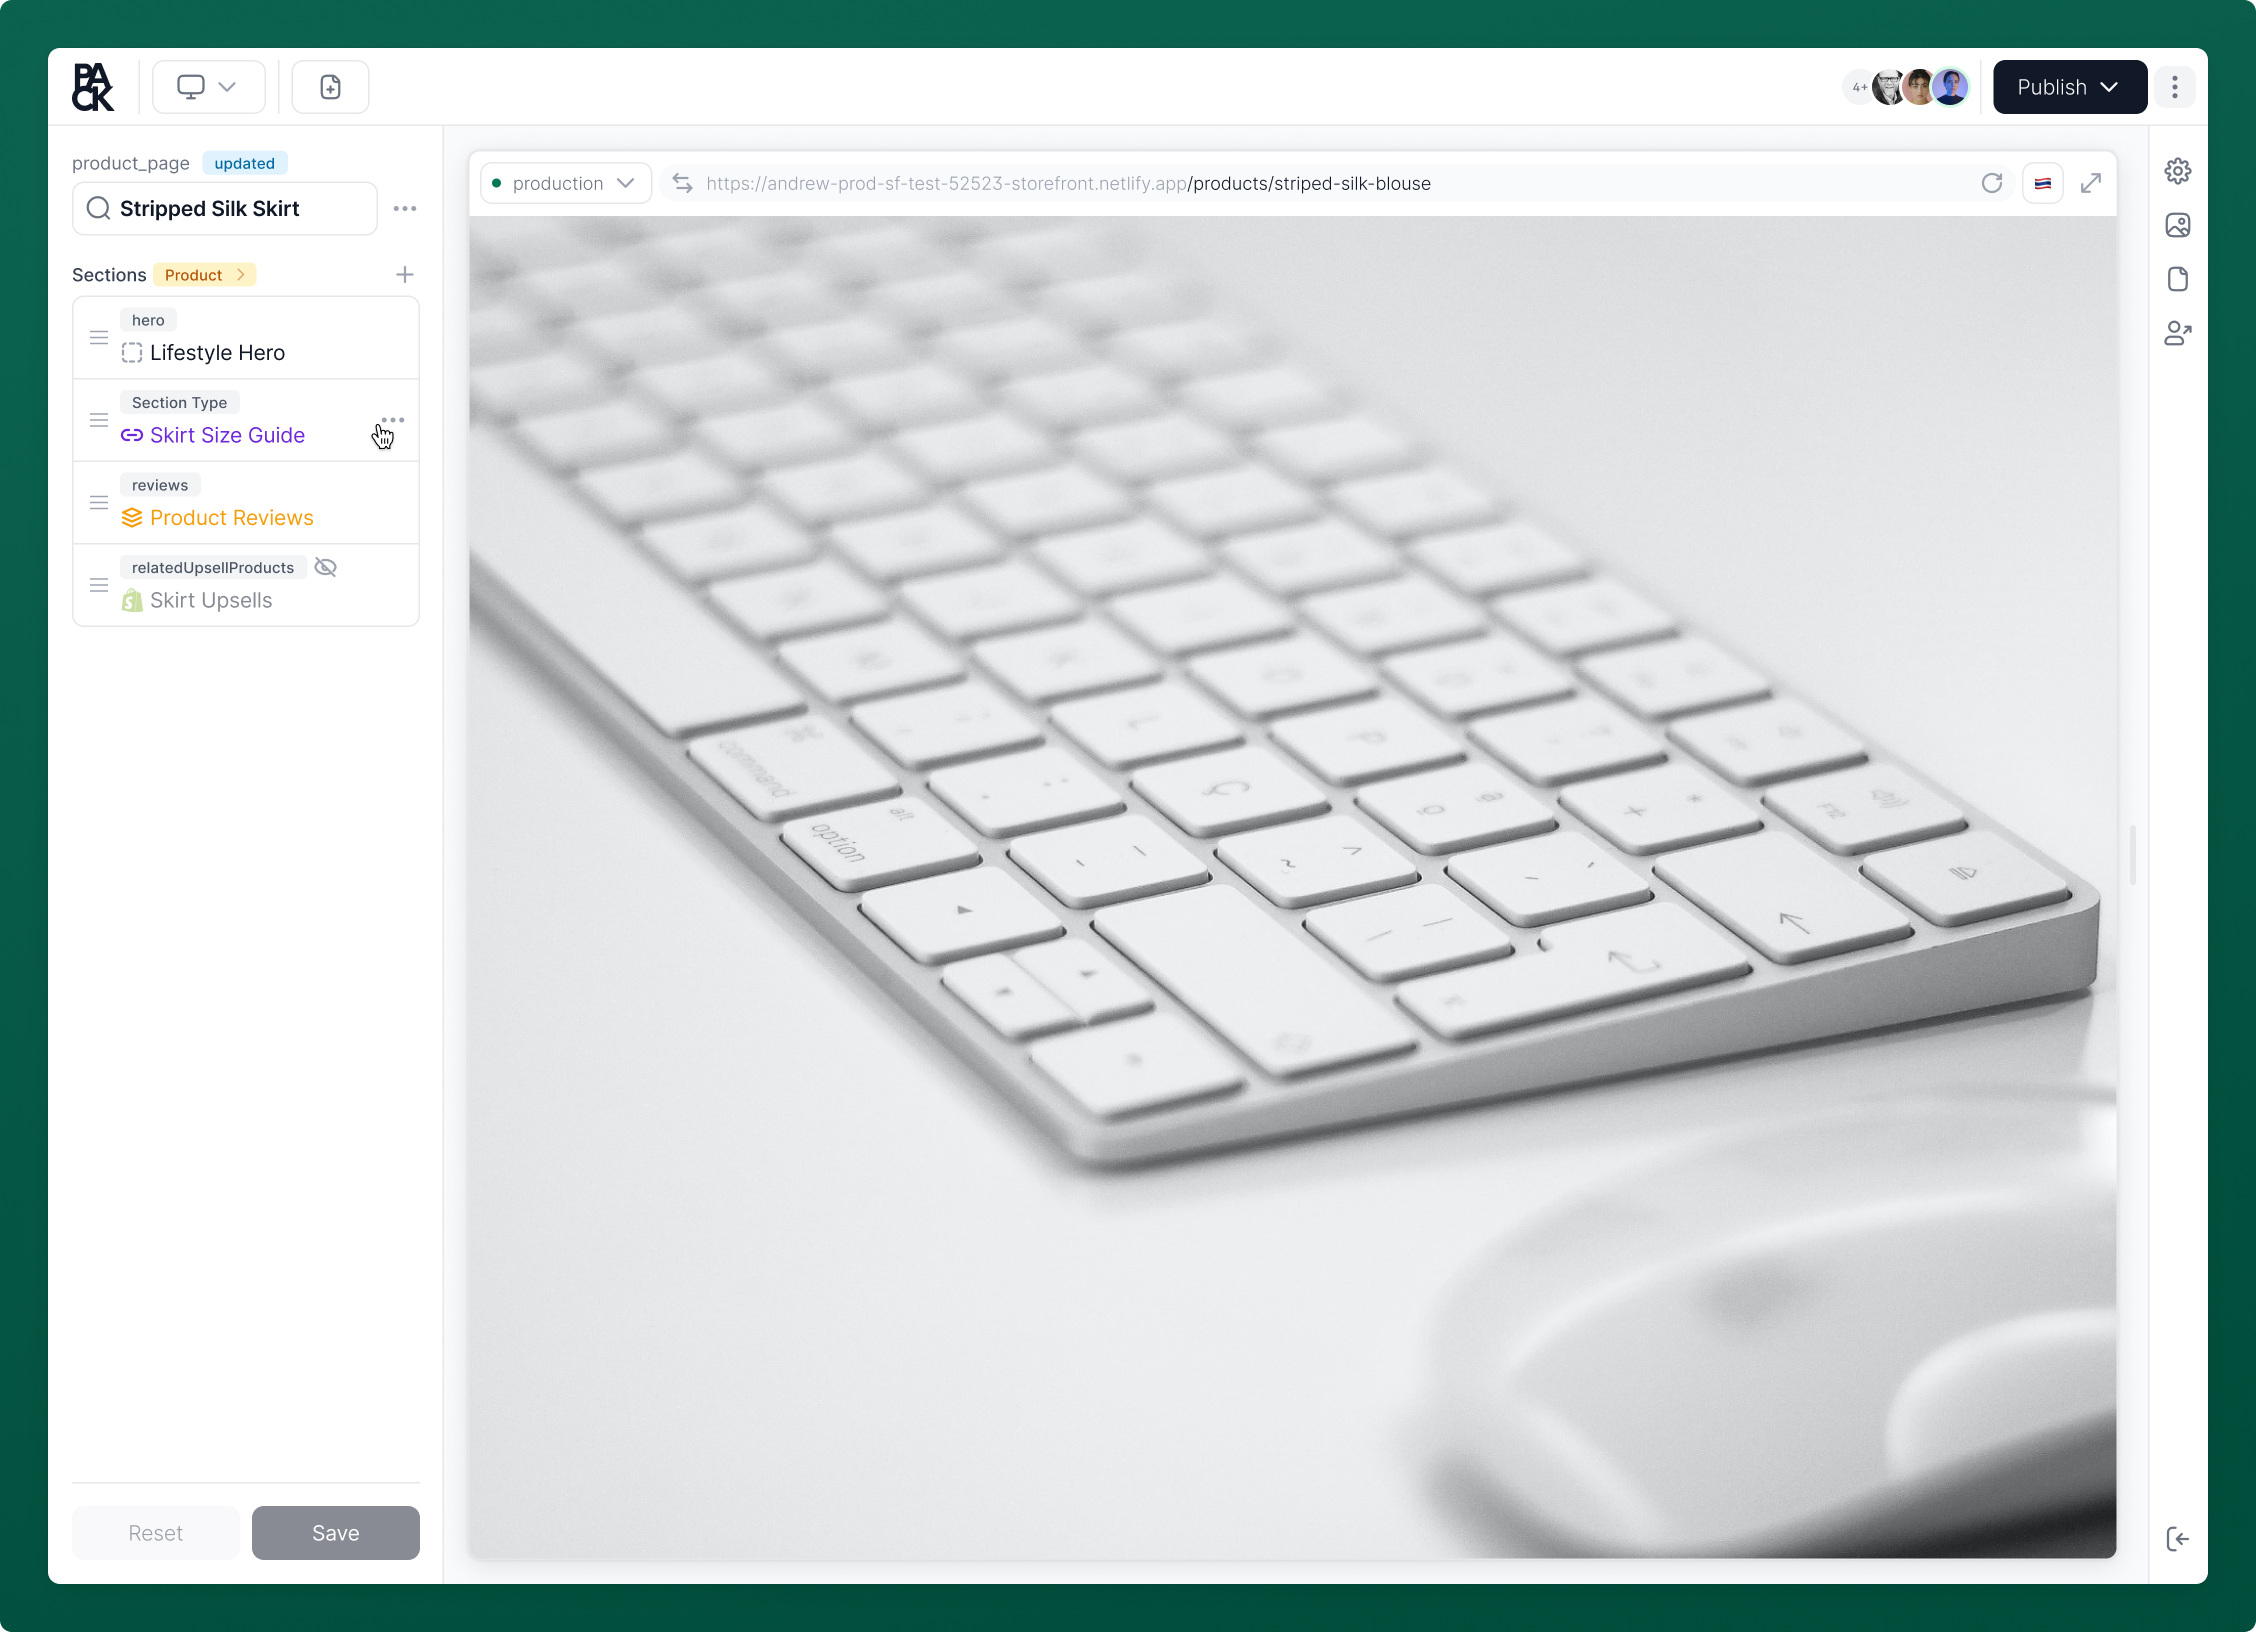
In Customizer, you can manage content on your pages in the form of sections. You can create flexible and reusable content across pages by linking sections and leveraging section templates.
Learn how to manage your content here.
Storefront and Shop Preview URLs
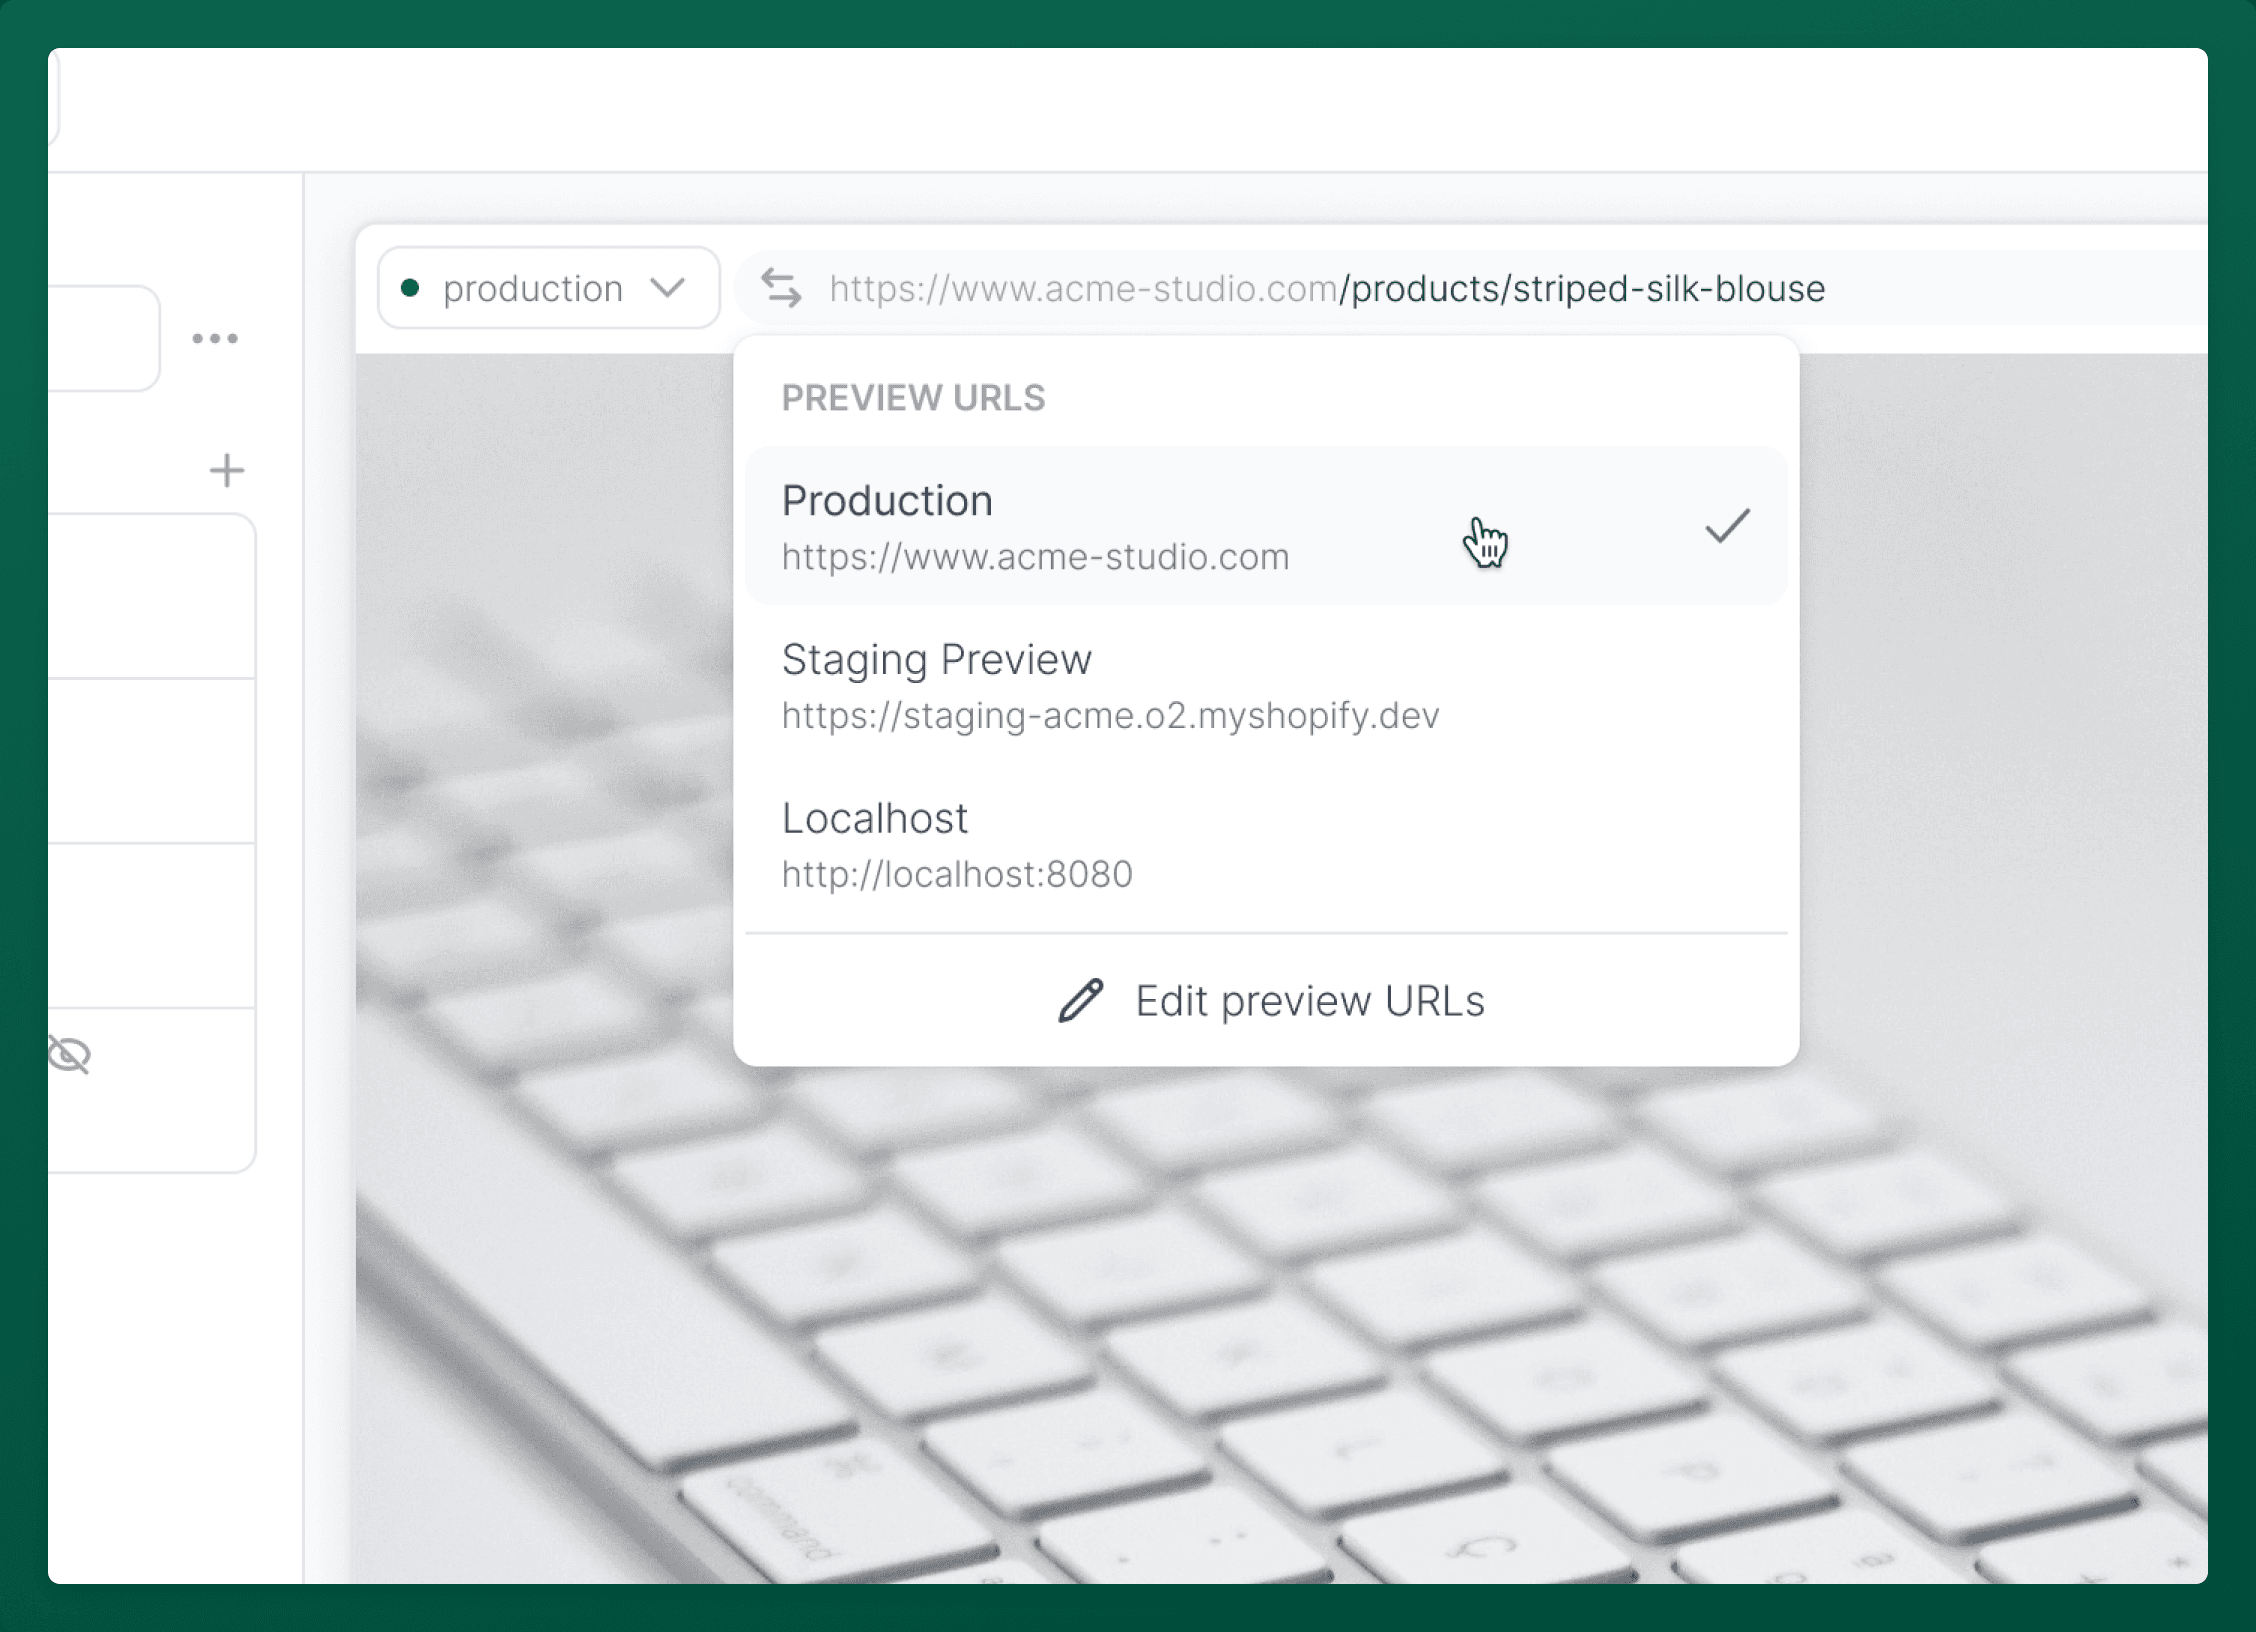
Switch between preview URLs to view and make changes specific to any previews, whether you’re looking at new sections or tweaks to a layout. Add or remove custom URLs to fit your team's workflow.
Learn more about preview URLs by checking out this guide.
Storefront and Shop Settings
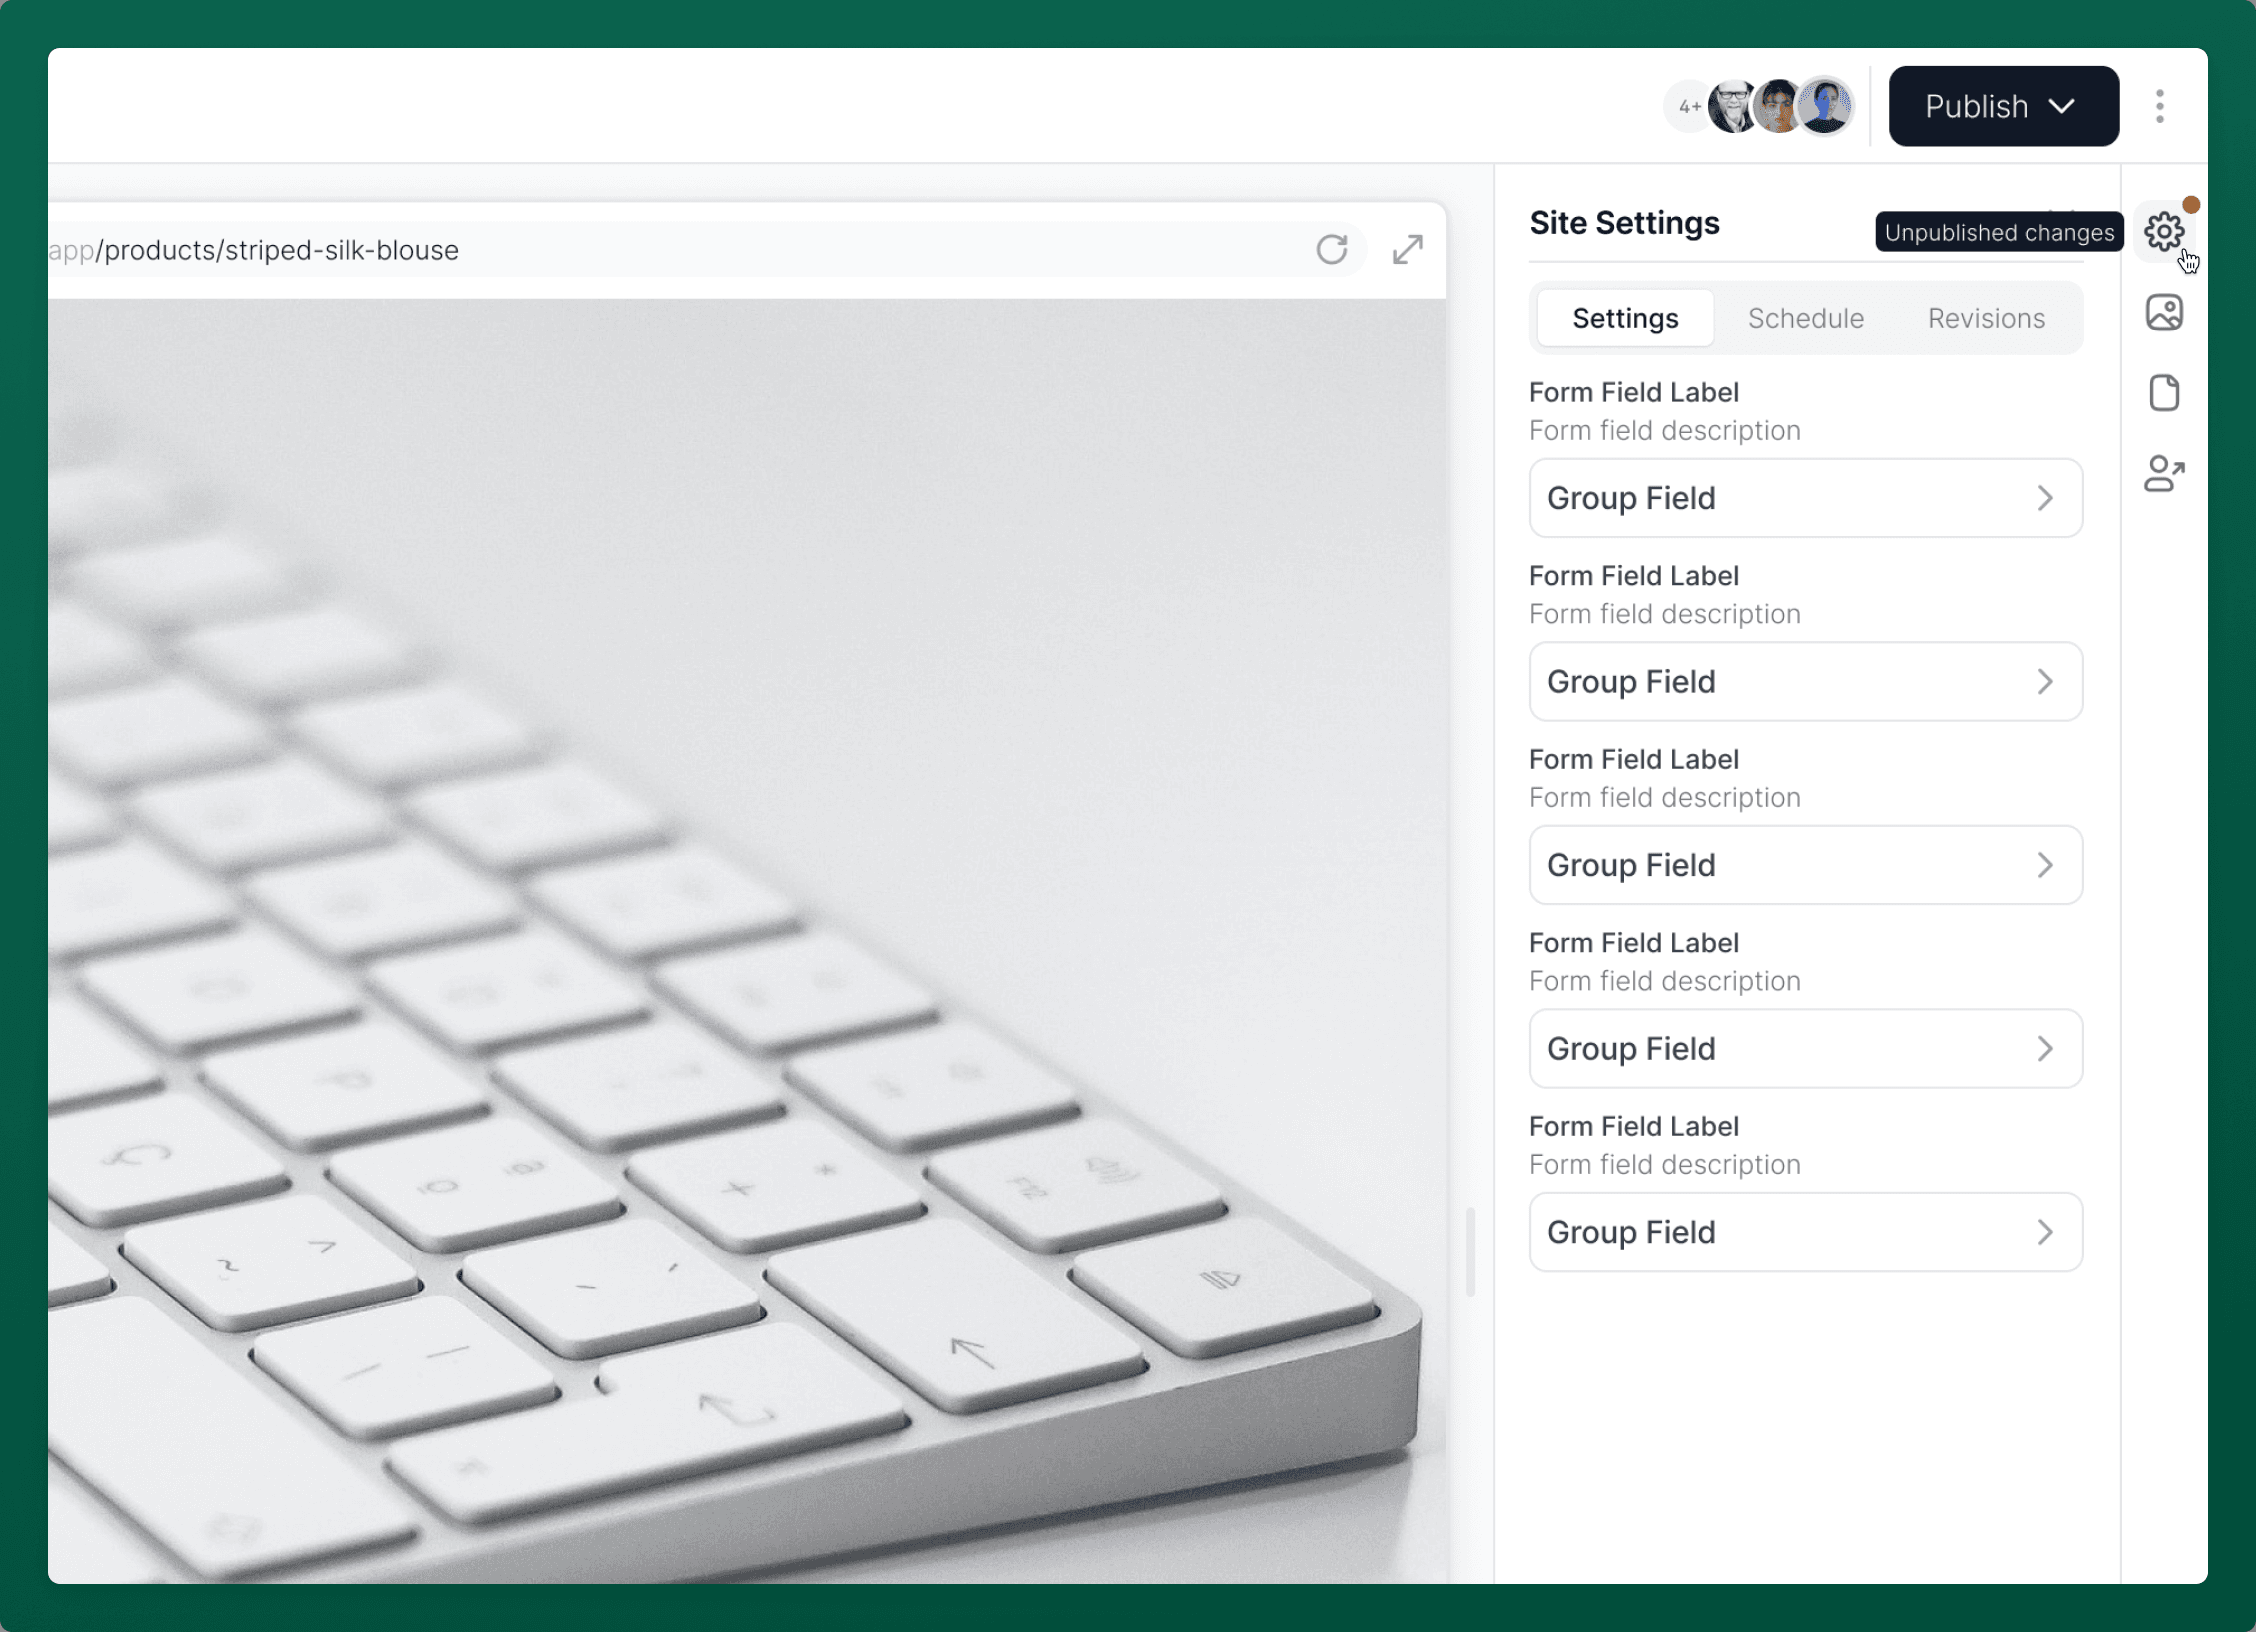
Storefront and Shop Settings is the hub for adjusting your store’s main features like headers, footers, and cart settings. It’s fully customizable, letting you add or remove settings as needed.
You can quickly access Storefront or Shop Settings from the right utility bar in the Customizer.
To learn more about how to use the settings, check out our guide for Managing Storefront and Shop Settings.
Content Environments
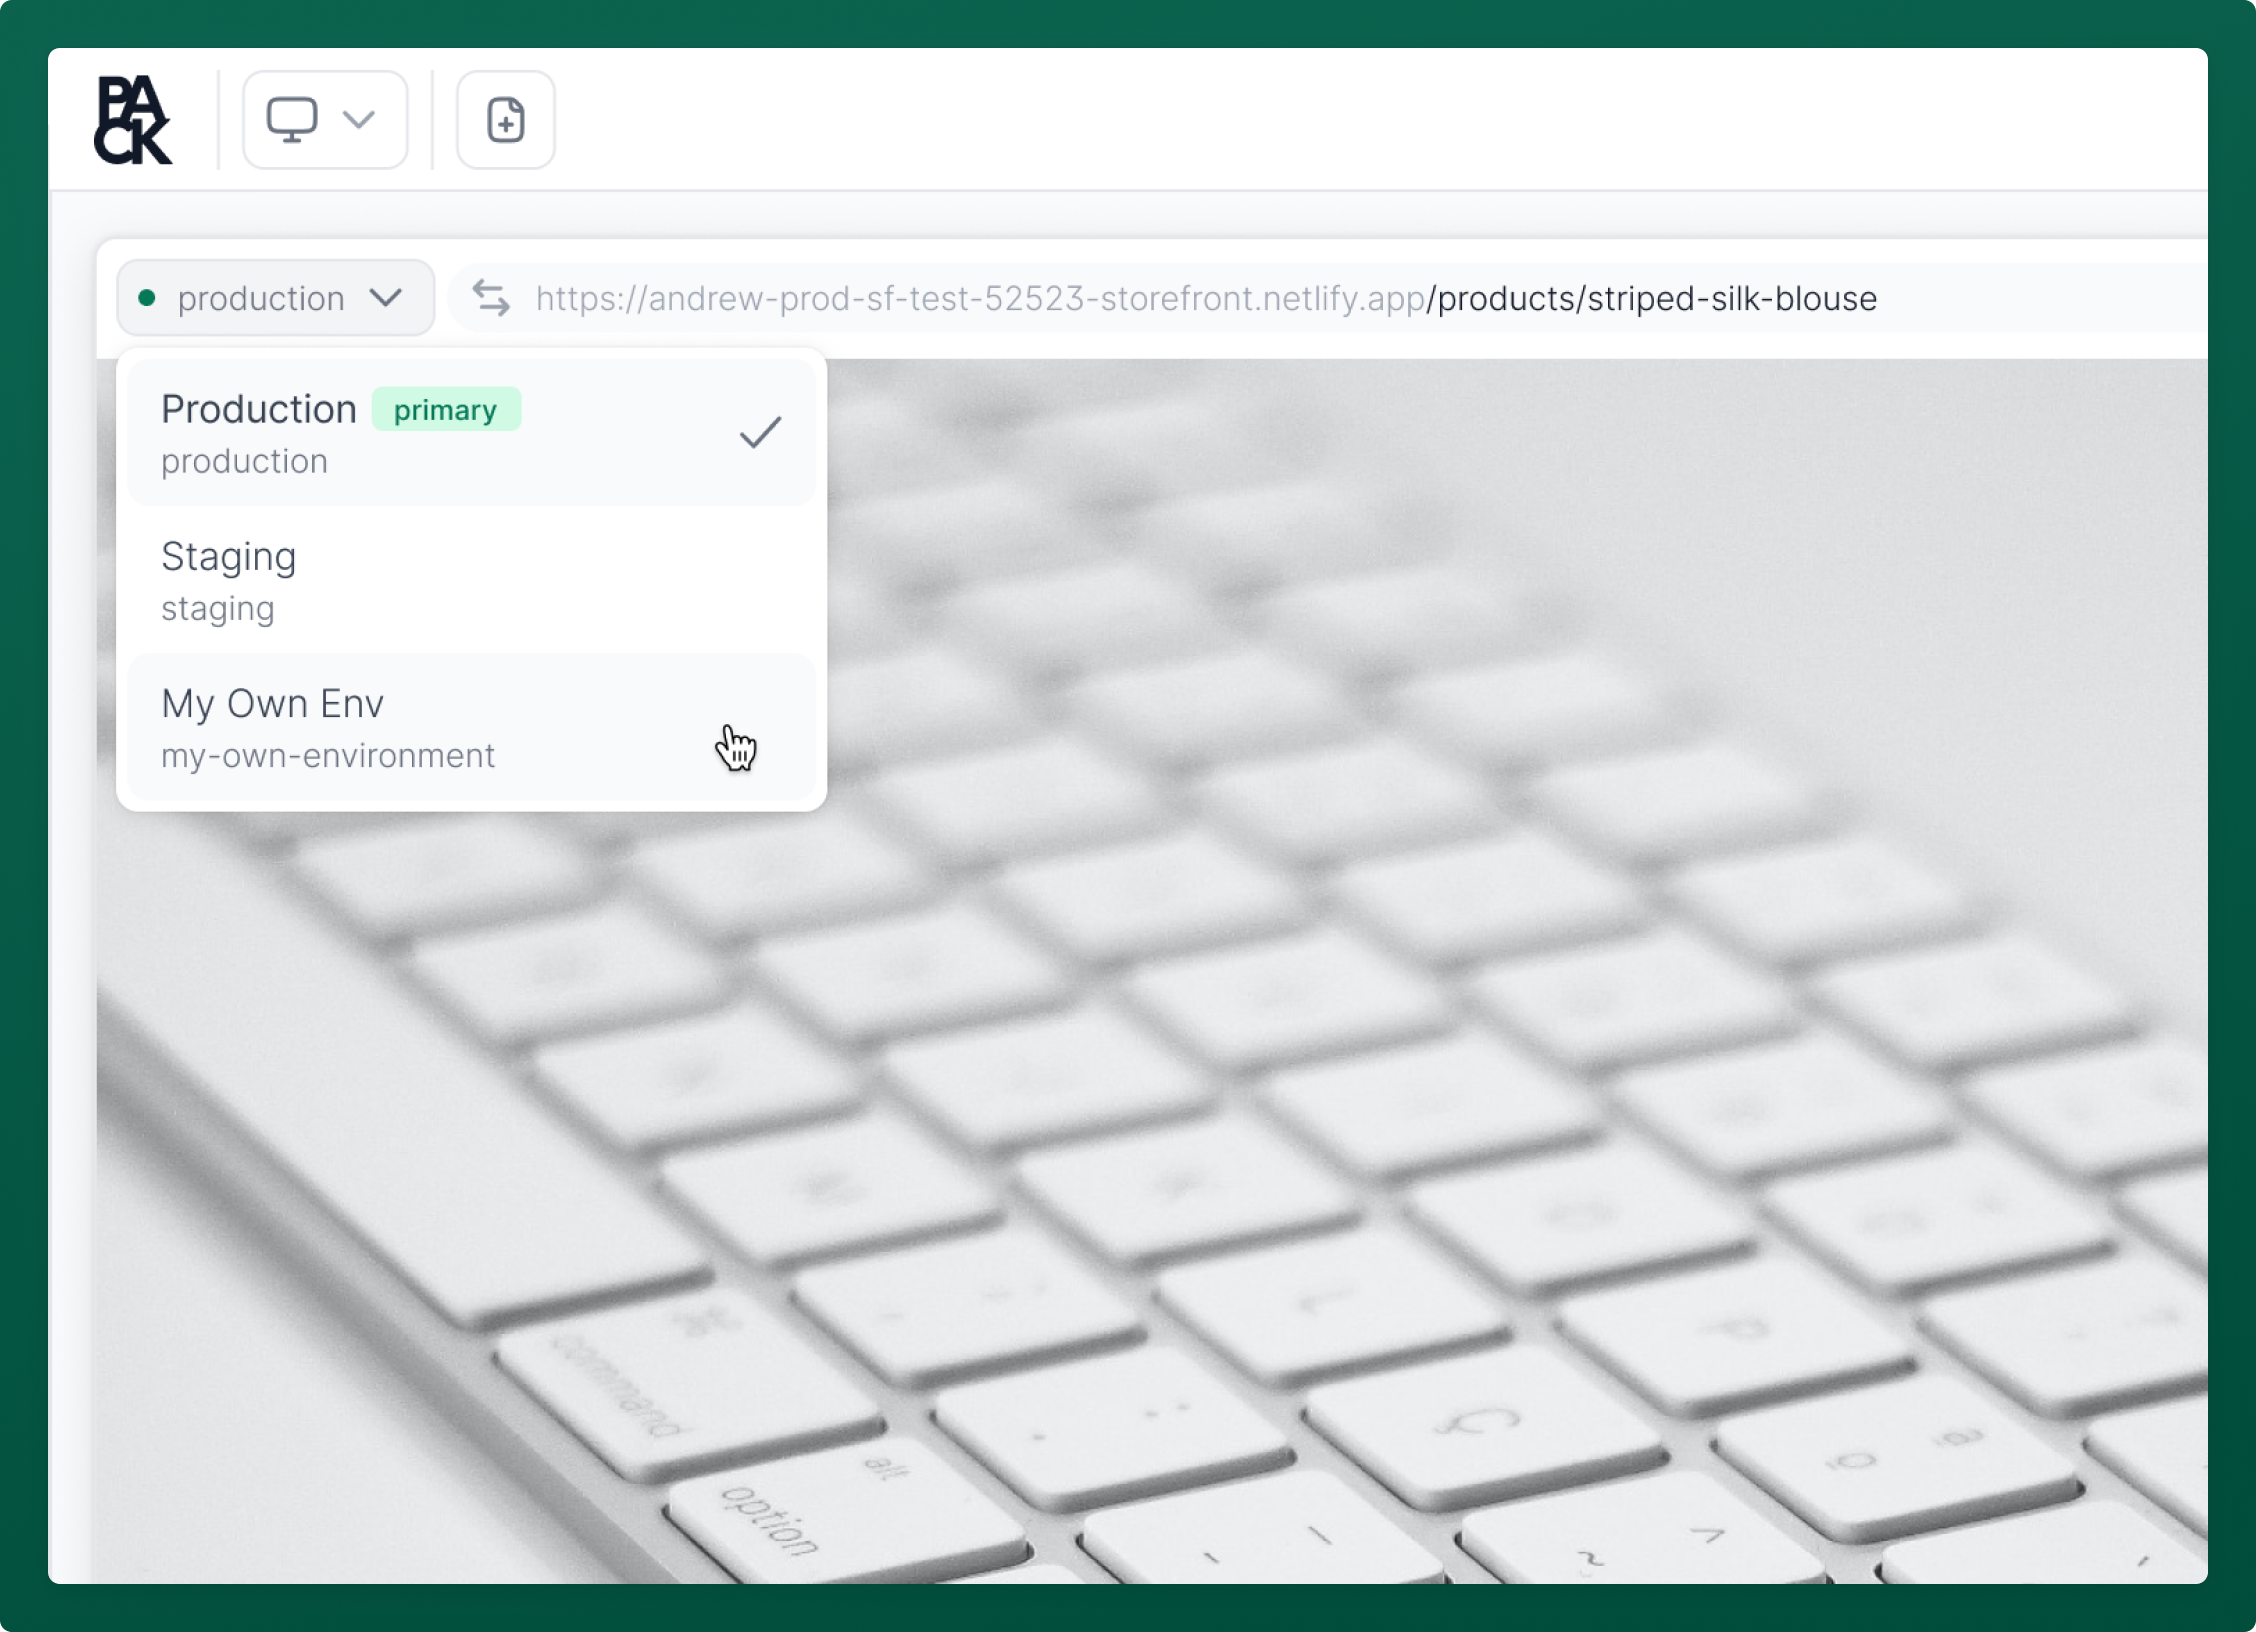
The Customizer allows you to switch between content environments to make it easier for your team to manage and maintain isolated instances of your storefront. This will allow you to visually test and edit content with a simple switch of a toggle.
Content Scheduling
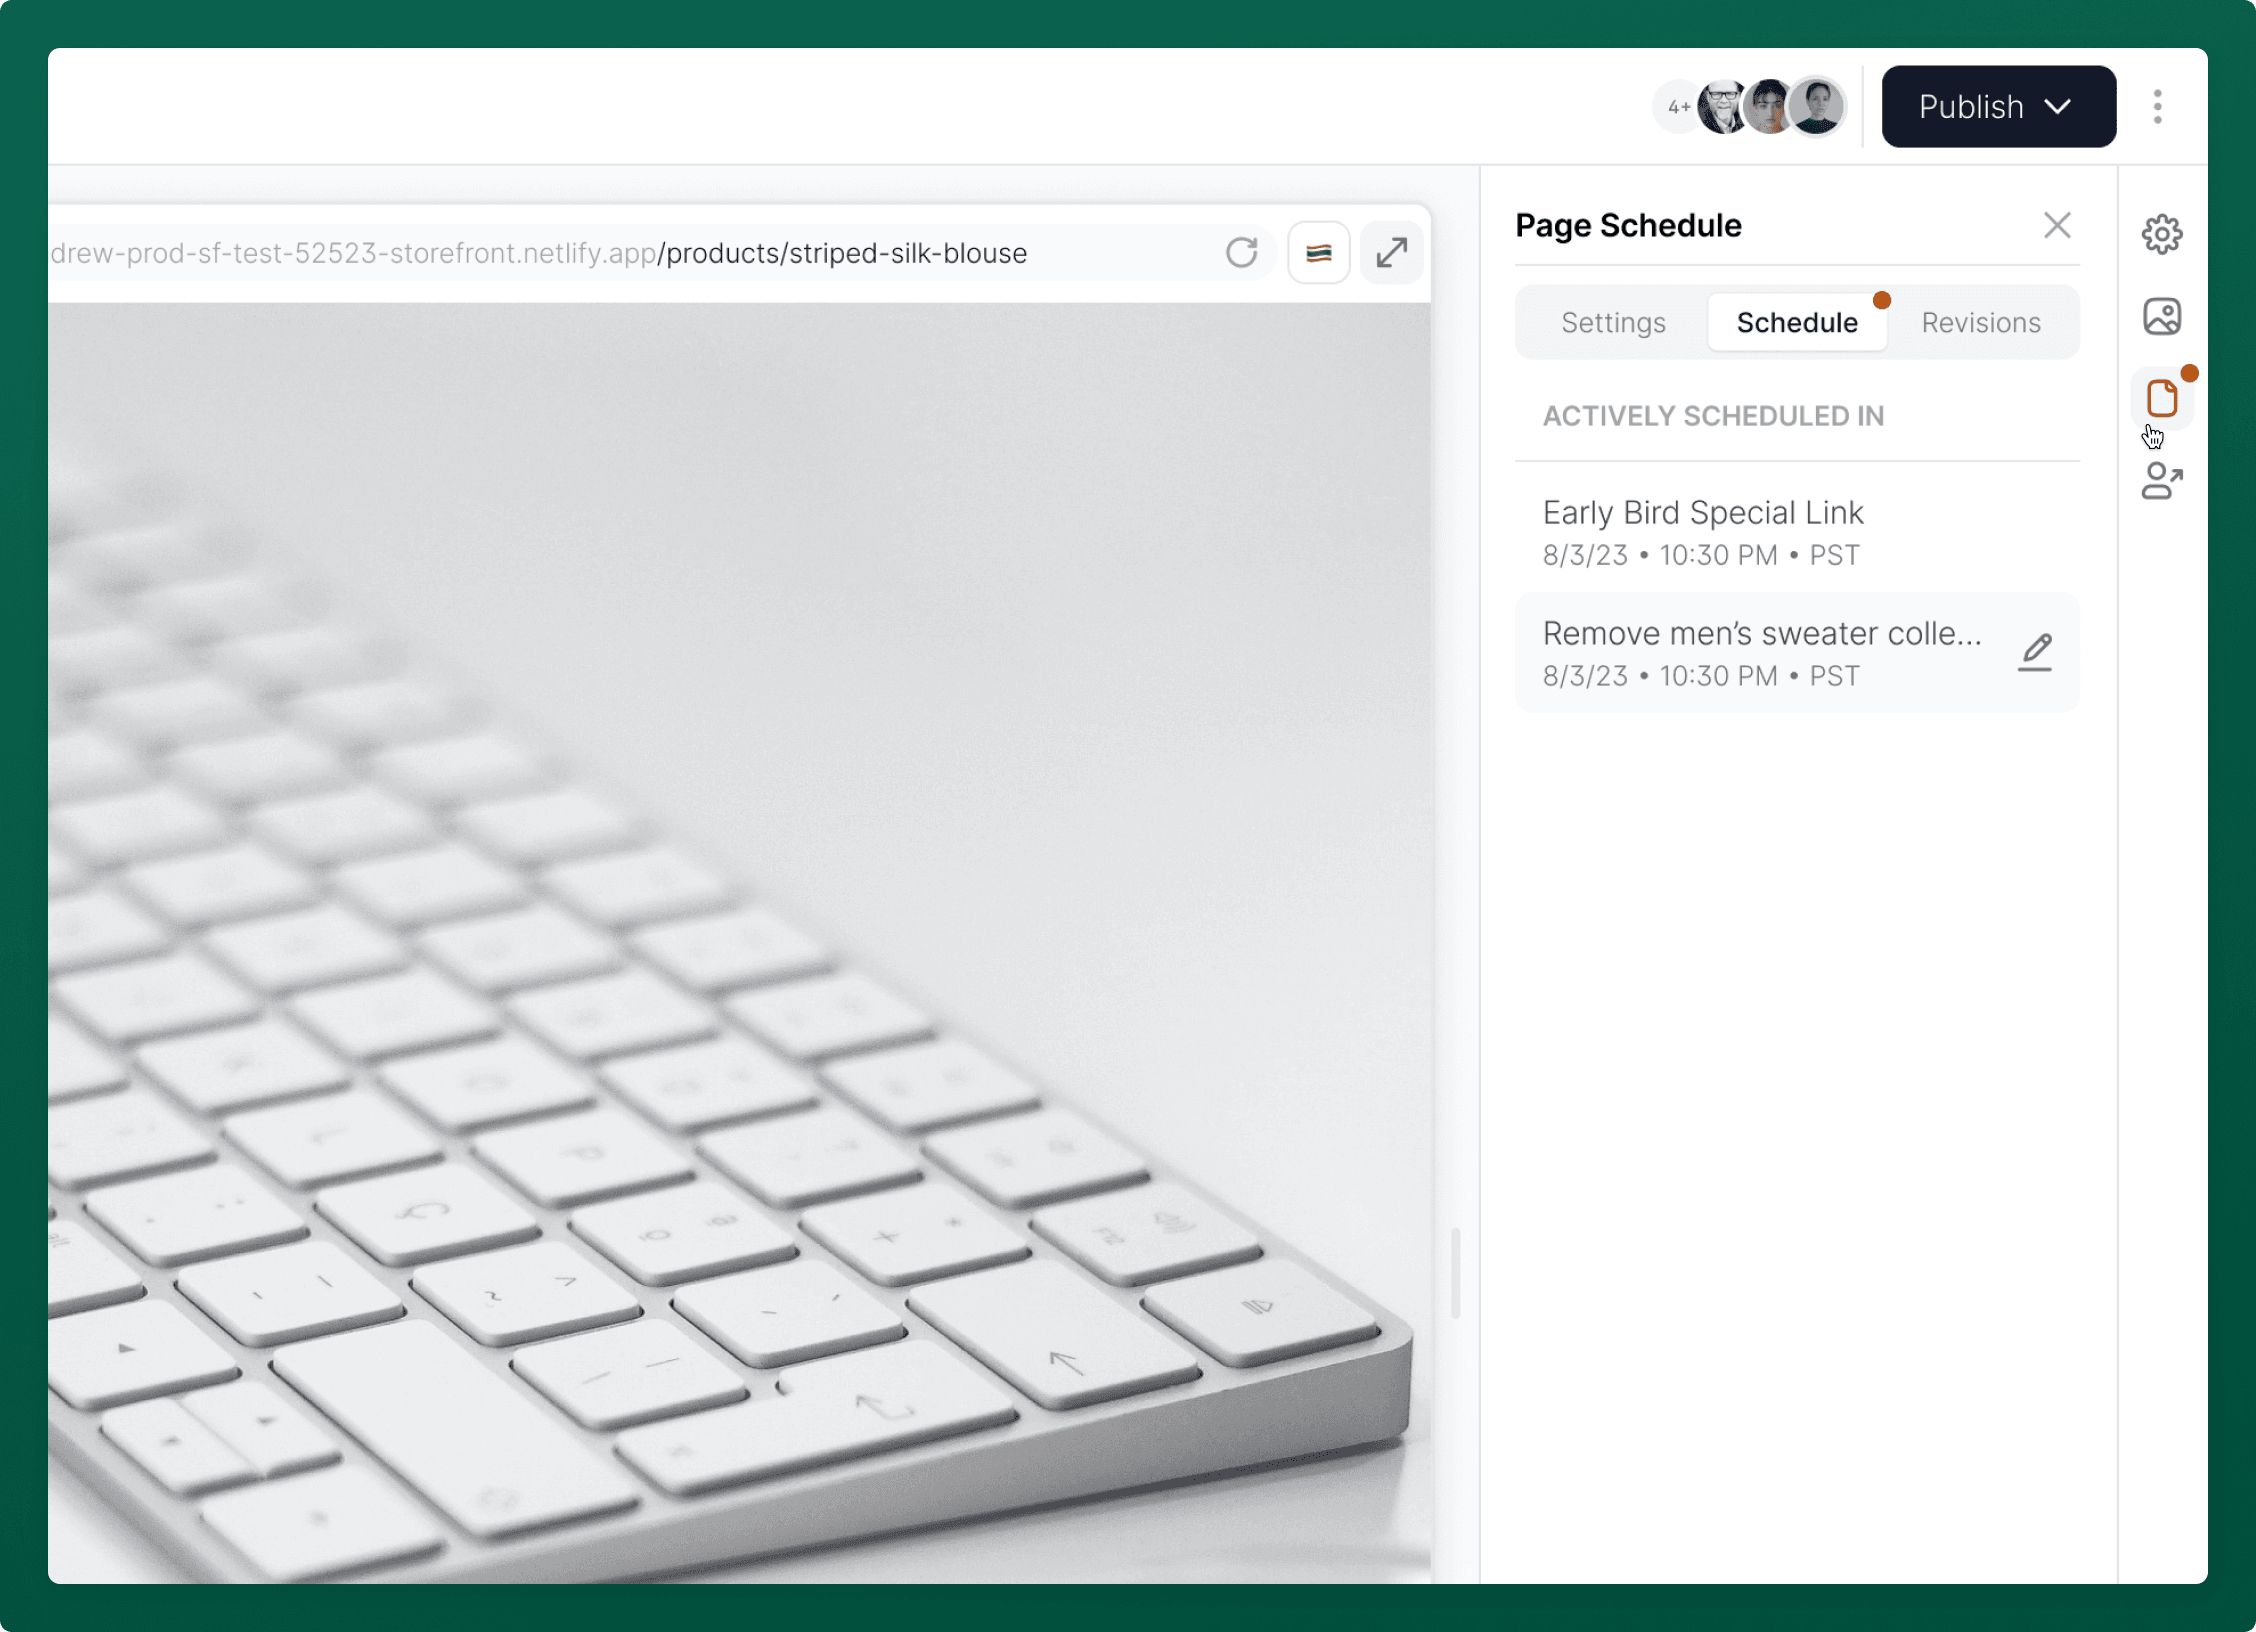
You can schedule pages and site settings in the Customizer to be published at a later date. This feature ensures your store updates exactly when you need it to, without having to manually publish pages.
Learn more about scheduling content here.
Content Releases
Content Releases let you stage a coordinated set of CMS changes and publish them together. Use the perspective picker in the Customizer toolbar to switch between Live, Releases, and A/B Tests. When you select a release, reads and saves are scoped to that release, and saved edits become release-scoped drafts instead of immediately changing live content.
Learn more about Content Releases here.
Media Manager
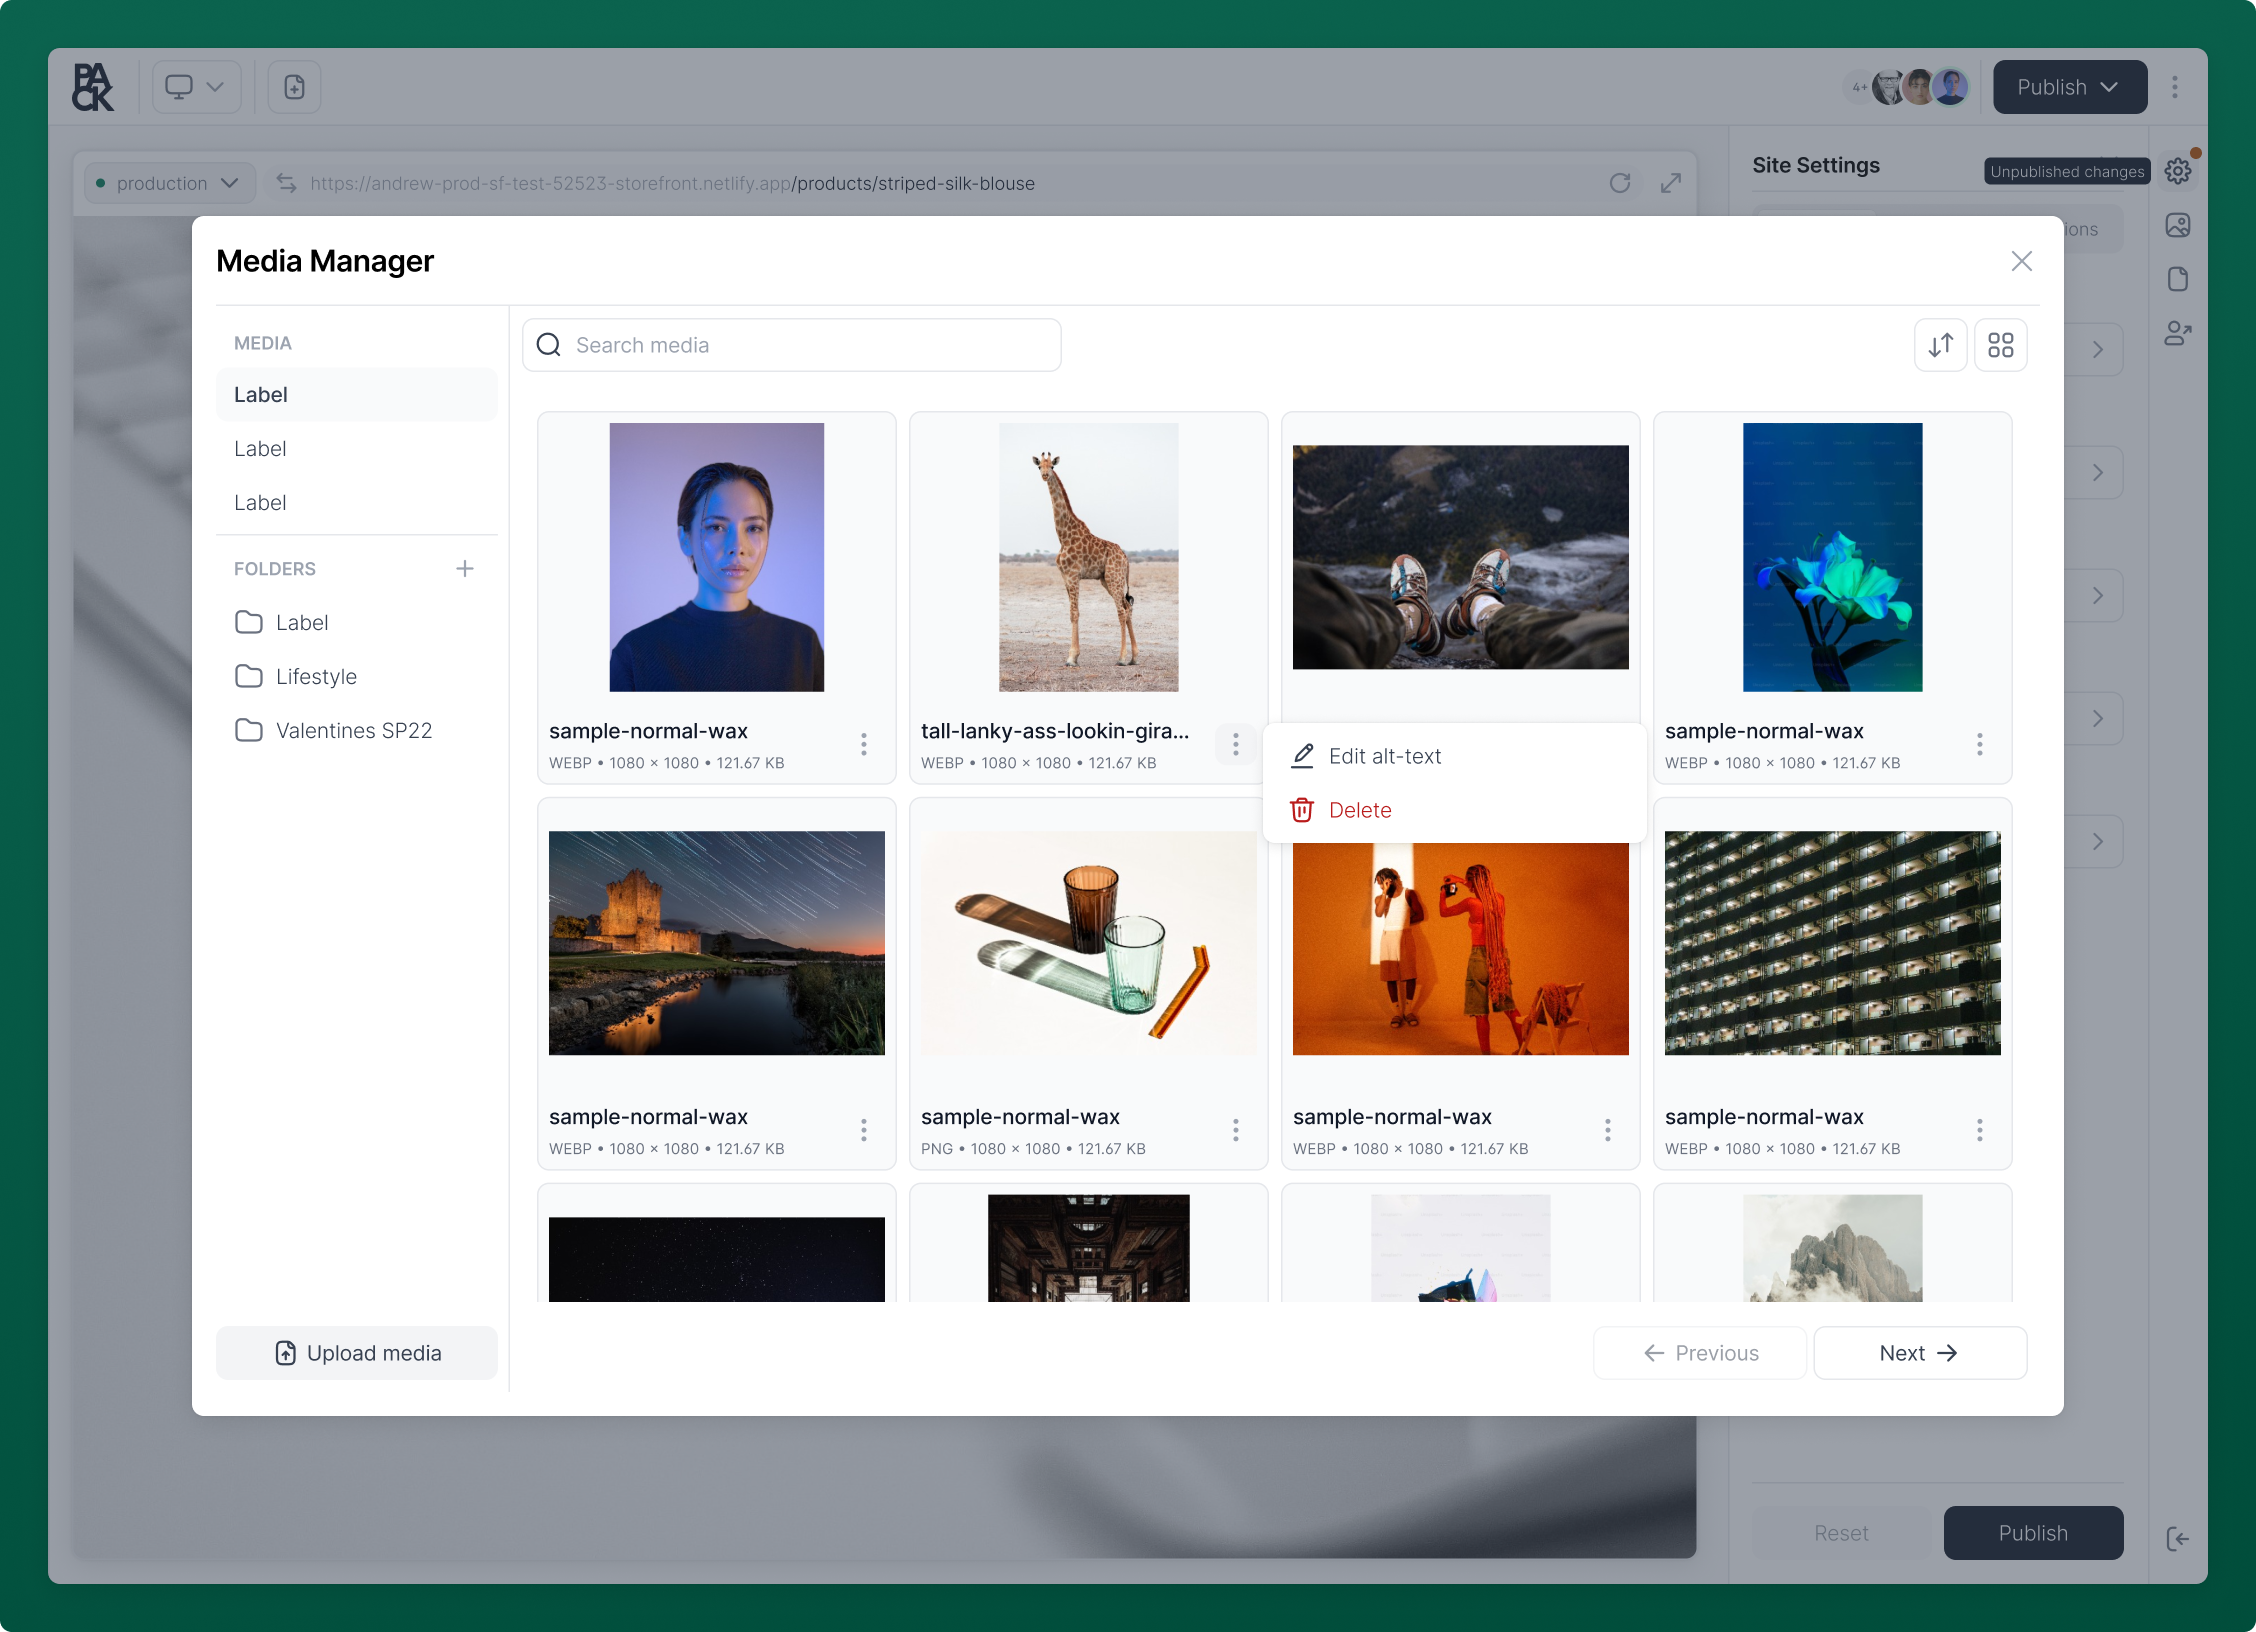
The Media Manager in Pack streamlines the process of managing your store's media. Easily upload, edit, and delete images directly from the Customizer.
Edits—including changes to alt text—synchronize instantly with Shopify, ensuring consistent media management across platforms.
You can access Media Manager from the right utility bar in the Customizer.
Explore the capabilities of the Media Manager in more detail here.
Layouts
Layouts let you save a page's section configuration as a reusable template and apply it to other pages. From the page menu (three dots) in the Customizer sidebar, you can Save as layout to capture the current page's sections, or Manage layouts to browse, edit, and apply your saved layouts.
Learn more about creating and managing layouts here.
Shareable Preview Link
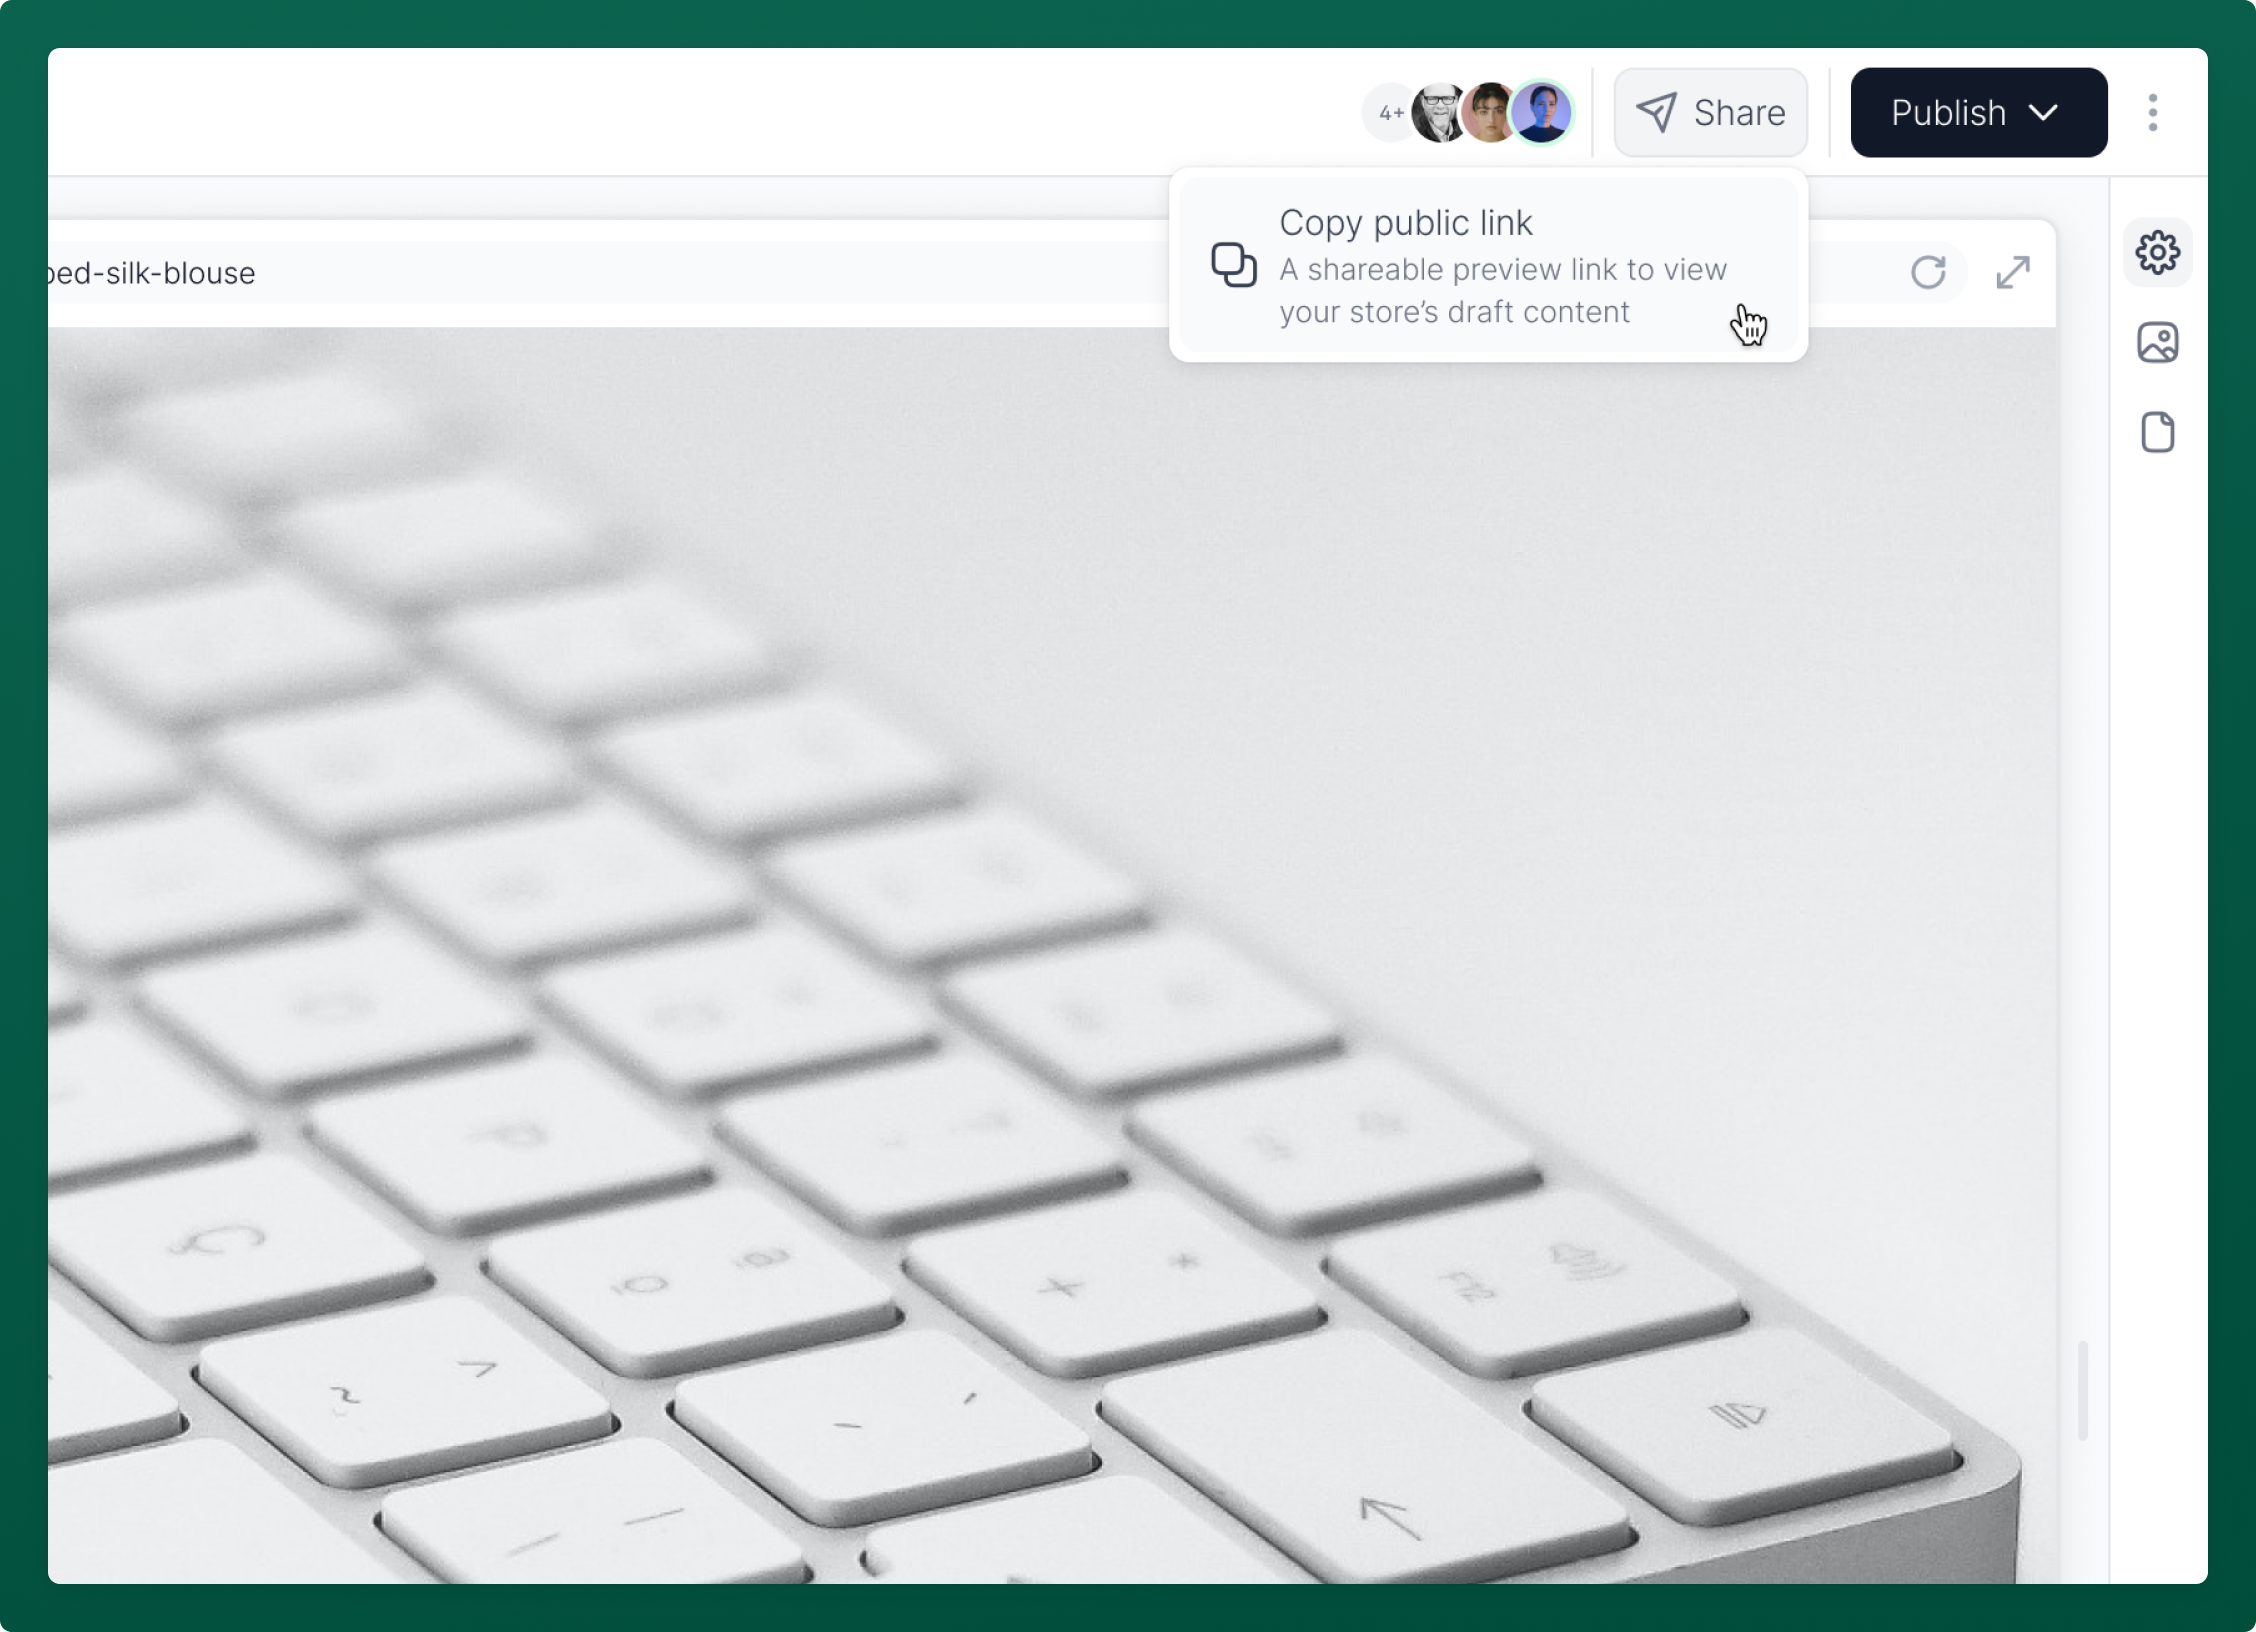
The Customizer enables you to share content drafts through a shareable preview link. This allows you to share unpublished work for your team's feedback or approval.
You can share a preview link with anyone by clicking the share button in the Customizer's toolbar.
Guides
Storefront and Shop Settings
Learn about how to manage your storefront and shop settings in the Customizer.